Hi, I am Aria, welcome to my life!

Showering With a Prosthetic Leg: Can You Get It Wet?
Can You Shower With a Prosthetic Leg? The Mistake That Could Ruin It


Showering with a prosthetic leg raises a question many amputees quietly worry about: can you get it wet without damaging it? Short answer: wearing your everyday leg in the shower is usually a no, and rain-resistant doesn’t mean shower-safe.
Recommended Products

BLOCCS 100% Waterproof Leg Cast Cover - #ASL74 Adult Short Leg | Made for swimming and bathing. Ultra-safe for showering. Keeps casts and dressings dry, so life feels normal.
Seals out moisture to protect your everyday leg from water damage during showers.

Moventix Gel Prosthetic Liner Sleeve for Residual Limb, Silicone Socket Cushion Cover, Soft Suspension & Skin Protection, 23.5–28 cm (9.3–11.0 in)
Smooth, comfortable layer between skin and socket; helps prevent irritation and rashes.

Globe Hydrogel Wound Dressing, Aloe Vera Gel, 1 Pack, 3 oz Tubes | Vitamin E Formula, Moisture Retaining Gel, Minor Skin Irritation Care, Cooling Feel, First Aid Kit Supply, Easy Application
Cooling relief for irritated residual skin and supports tissue repair after showers.
Check discounted items inProsthetic Accessories
This guide covers when a wet-rated leg might be okay, how to keep your socket and residual limb dry, and what to do if your leg gets soaked by accident. You’ll also learn about shower chairs, shower legs, and sealed covers, plus the one step to take before you wear your leg again.
Keep reading for a clear, safe plan that lets you shower with confidence.
Quick Answer
- Whether a prosthetic leg can get wet depends on its specific waterproof rating; rain-safe does not mean safe for showering.
- Unless your prosthetist confirms it is designed for wet use, keep your everyday leg out of the shower and sit on a shower chair.
- For regular wet use, ask your prosthetist about a water-ready leg, shower leg, or properly fitted waterproof cover.
- After showering, wash and thoroughly dry your residual limb before putting on the liner; check for redness, sores, or irritation.
- If water gets inside the prosthesis, stop using it and have your prosthetist inspect it before wearing it again.
Can a Prosthetic Leg Get Wet?
As an amputee, I check the manual before my prosthetic leg gets near water. Many legs handle rain only, and a full soak in a tub or pool can damage them.
I check my prosthetic leg’s manual before water, since rain-safe doesn’t mean safe for a bath or pool.
Water can cause rust and dampness in metal parts, weaken the joints, and wear out seals faster than expected. Your prosthetist can tell you exactly what your leg can handle.
A wet foot gets slick, so don’t assume it will grip the way a shoe does. Walking on wet tile or grass can cause a fall.
If you need water access, review the waterproof options with your prosthetist before you buy anything. Ask about cost, fitting, and replacement parts first.
A water ready leg is built for wet use from the start. A shower leg is a standard leg with a grippy silicone foot, which makes it safer on wet floors.
A waterproof cover may cost less, but its seal must match your residual limb and the components of your leg. A poor seal lets water reach the socket, liner, and joints. Waterproof cast covers often use elastic, neoprene, or silicone seals designed for showering and bathing, but they are not guaranteed to fit prosthetic components.
If the leg gets splashed, dry it right away with a soft towel and let it air dry fully. If water gets inside, call your prosthetist for an inspection.
Trust the maker’s rating over guesses or hope. I’m not a sealant expert, so I rely on my prosthetist for those decisions.
How to Shower Safely With a Prosthetic Leg
As an amputee, I keep my everyday prosthetic leg dry during most showers. I sit on a shower chair unless my prosthetist confirms that my leg is made for wet use.
Before I step in, I check the seal on the cover. One loose edge lets water in, and then my dry plan fails.
A shower leg needs a grippy foot and my prosthetist’s approval. I never use my everyday leg in the shower.
Good chair placement keeps me seated and lets me reach the taps and soap without twisting. I set the chair so my residual limb and prosthetic socket stay clear of the direct spray.
When I use a handheld showerhead, I point the water away from my prosthesis. I control the spray with my hand so the water stays off the leg.
I wash my residual limb with gentle soap. Then I check the skin for redness, irritation, or swelling.
I pat the residual limb dry before I put on a liner. Moisture trapped under a liner can cause skin irritation, so I take extra time with this step.
If I’ve stitches, I keep them dry until my clinician approves bathing. I follow that advice even when the wound looks healed.
If my everyday leg gets wet, I drain it right away. Then I ask my prosthetist to inspect it because hidden dampness can weaken components.
I stay seated for the whole shower. Sitting keeps my balance steady and lowers the risk of a fall.
Medical-grade silicone or high-tension PVC seals provide durable, watertight protection that resists tearing and repeated flexing for prosthetic covers.Set Up a Safer Bathroom for Showering

Even when I sit to shower, I treat the bathroom as safety equipment.
I treat every part of the bathroom as safety equipment, even when I shower seated.
I set up every part of it before I step in, because a fall on a wet floor can cause serious injury.
I place a shower chair where I can sit down before I turn on the water.
All four feet sit flat on the floor, and the seat stays clear of the spray.
That placement keeps my transfer short.
A short transfer matters on days when my balance is off, and it also spares my residual limb from extra strain.
If I’ve a tub and shower combination, I consider a tub transfer bench.
The bench spans the tub wall, so I can sit outside the tub and slide across.
Before I buy one, I check its weight limit and measure the tub.
A bench that almost fits will still cause trouble, so I only buy one that fits exactly.
Many models include reversible backrests and suction cups that grip the tub floor for added stability.
I have grab bars professionally installed beside the shower.
Towel bars aren’t built to hold my weight, so I never use them for support.
I also add mats that grip the floor and keep rugs and cords out of my path.
I keep soap, towels, and a handheld showerhead within reach of my seat.
I set my prosthesis and a dry towel outside the spray so they’re ready when I finish.
Floor, seating, and grab bars come first, so I fix those three things before anything else.
Protect Your Prosthetic Leg With Shower Gear
When my everyday prosthesis isn’t rated for water, I keep it out of the spray. I use shower gear made for bathing instead.
A dedicated shower leg is my simplest option. Its silicone gel foot grips wet floors, so I keep my footing on tile.
A waterproof cover is another choice. It fits over my regular leg and seals tightly around the socket.
Some covers use a hand pump to pull air out. That vacuum seal keeps water from getting in.
Before I buy anything, I check the fit and the weight limit. Covers usually cost between 30 and 100 dollars. For heavy-duty options, I look for 600D Oxford fabric that withstands tearing and wear.
Shower legs cost more, and many need a fitting with my prosthetist. I choose one with a textured sole for steady footing.
I pick a cover sized for my prosthesis. I test the seal before I step into the shower.
When standing feels uncertain, I use a shower chair. Sitting keeps me safe and in control.
Adaptive tools help me reach without twisting my residual limb. A sponge with a long handle and a showerhead on a flexible hose make bathing easier.
I ask my prosthetist which gear suits my components. Water resistant doesn’t always mean waterproof, so I read the label carefully.
I protect my everyday leg and use gear designed for bathing. That keeps my leg dry and my shower safe.
Clean and Dry Your Residual Limb After Showering

As an amputee, I wash my residual limb with mild soap after every shower. Clean skin helps lower the risk of irritation and infection.
I rinse the skin well, then I check it for redness or sore spots. Finding a problem early keeps a small spot from turning into an open sore.
After that, I pat my residual limb dry before I put on my prosthetic liner. Damp skin trapped inside a snug socket can lead to rashes and skin breakdown.
For irritated skin, I apply an aloe-based hydrogel that provides cooling relief and supports tissue repair.
Wash Residual Skin
After every shower, I dry my residual limb carefully. A few extra minutes now saves me from itching and irritation later.
I wash my residual limb with gentle body soap and lukewarm water. Then I rinse it well so no soap stays on the skin.
I don’t scrub hard, because the skin inside my prosthetic socket already works hard all day. Harsh scrubbing can leave it sore.
I use clean hands to check the folds and the end of my limb. This helps me spot problems early.
I look for redness, blisters, cuts, or sore spots every day. If something worries me, I call my prosthetist or doctor right away.
If I’ve stitches, I keep them dry until my doctor says water is safe.
Clean skin is the starting point for good liner hygiene. Healthy, unbroken skin keeps my liner fitting well and protects me from pressure sores. Medical-grade silicone and breathable polymer blends help keep the interface dry and reduce friction during wear.
If I see a rash, I don’t cover it and wait for it to fade. I ask my clinician what to do and whether my prosthesis needs any changes.
Dry Before Liner Application
I wait until my residual limb is completely dry before I put on my liner. I never take shortcuts with this step. A damp liner can trap moisture against the skin, which invites irritation and rashes, and nobody wants their morning to start that way.
After I shower, I pat my skin dry with a clean, soft towel, paying extra attention to the folds and the end of my limb. I never rub the skin, because rubbing can cause irritation and leave it raw.
Next, I let my limb air dry, then I check for any damp spots. If I’m in a hurry, I use a fan on a cool setting, because heat can dry the skin unevenly and cause damage. For persistent moisture issues, choosing high-performance synthetic fibers that wick sweat can support rapid evaporation and reduce skin-breakdown risk.
Dry skin helps the liner stay secure on my limb, which keeps the socket fit steady. It also supports moisture wicking, the process that moves sweat away from the skin.
Before I put on the liner, I check my skin for redness or sores. If I’ve stitches, I follow my prosthetist’s advice before I get them wet.
Clean, dry skin comes first, and the liner goes on second. I follow this order every day so my residual limb stays healthy and comfortable inside my prosthesis.
What Should You Do If Your Prosthetic Leg Gets Wet?
I’ve worn a prosthetic leg for many years, so I know that getting it wet is a problem to fix quickly. Water can reach the metal parts, the joints, and the foot, and it can cause rust and damage.
I turn the leg upside down so trapped water can drain out of the pylon and the joints. If the foot shell comes off, I remove it so the inside can dry too.
I wipe every part with a clean towel, paying close attention to the socket and the connection points. Then I check each bolt and screw for looseness.
A loose bolt is easy to miss when you’re in a hurry, so I take a minute to look at and feel each joint. If I see rust, a crack, or any wobble, I stop using the leg and call my prosthetist.
If my liner or suspension sleeve gets wet, I take it off and let it air dry away from direct heat. Heat can make the material stiff and cause it to shrink, so I avoid hair dryers and space heaters. To maintain a secure fit, I also check that the sleeve’s elastic material still springs back into shape after drying, as this preserves its suction and friction-reducing grip.
Dry It Immediately
As an amputee, I know how fast water can get into a prosthesis, so act quickly. Turn the prosthesis over so the water can drain out.
Remove the foot shell if you can. This lets moisture escape before it settles against the components.
Pat the accessible surfaces dry with a clean, soft towel. Blot the creases and the foot shell with a second towel so you don’t rub grit into the finish.
Let the parts air dry indoors, away from direct sunlight and radiators. Heat can damage the materials, so air drying takes longer but protects your prosthesis.
Check the manufacturer’s care instructions, since materials vary from one brand to another. If water reached a sealed section or a joint, call your prosthetist for advice before you try to fix anything yourself.
Inspect Components For Damage
After I dry my prosthesis, I inspect it before I wear it again. Water can hide problems that a quick glance will miss.
I check the foot shell, liner, joints, bolts, and any exposed metal.
I look for cracks, swelling, rust, loose parts, and water trapped inside.
These signs can point to worn parts or moisture damage.
Next, I turn the leg upside down so any water can drain out.
If my model allows it, I remove the foot shell so the inside can dry fully.
I never use heat or pry at parts to speed things up.
A hair dryer can damage the materials, so I let the leg air dry.
If I see damage, hear a new noise, or feel a change in fit, I don’t wear the prosthesis.
I call my prosthetist, the specialist who maintains my leg, and ask for an assessment before I walk or shower with it again.
Is a Waterproof Prosthetic Leg Right for You?
As an amputee myself, my quick verdict is this: a waterproof prosthetic leg makes sense if you need to be in or around water on a regular basis. It isn’t a must-have for every shower.
I would consider one for swimming, beach trips, or frequent wet work. For everyday bathing, a shower chair and careful drying are often simpler.
Ask your prosthetist whether your whole setup can handle water, including the socket, joints, and foot. Waterproof durability varies by model, and the seals or joints may still need care.
Check with your prosthetist that the socket, joints, and foot can handle water; seals may still need care.
Compare these three options:
- A dedicated waterproof leg can stay on during swimming, but the cost and fitting depend on your needs.
- A shower leg with a grippy silicone foot can reduce slips, though it’s a separate device.
- A waterproof cover may protect your everyday leg, but check its seal and follow the use instructions.
Water resistance doesn’t prevent wear, so drying your residual limb, socket, and prosthesis promptly still matters. Ask about the warranty before you buy, then choose the option that fits your daily life.
Frequently Asked Questions
Does Showering Affect My Prosthesis Warranty?
Showering can affect your prosthesis warranty only if the device is not rated as waterproof. Check your warranty terms and the manufacturer’s water resistance rating before you shower with it.
Many prosthetic components use water-resistant seals, but the liner, socket, and electronics may react differently to soap and long exposure. Ask your prosthetist which parts are safe to get wet.
Today, try this: after showering, remove the liner, wipe the socket with a dry towel, and let all parts air dry for at least 30 minutes before reattaching. This keeps moisture from breaking down the seal.
Following your drying routine also creates a clear record if a warranty claim arises.
Will Insurance Cover a Waterproof Prosthesis or Shower Leg?
Insurance may cover a waterproof prosthesis or shower leg, but approval is never guaranteed. Coverage depends on your plan’s criteria, policy limits, and whether your prosthetist can document medical necessity.
Start by calling your insurer and requesting the written coverage criteria for a waterproof prosthesis so you know exactly what documentation they expect. Ask your prosthetist to write a letter explaining how a shower prosthetic leg supports your daily hygiene, skin health, and bathroom safety.
If the claim is denied, file a formal appeal and ask whether a waterproof foot or a water-resistant socket would be approved as an alternative.
Can Bath Oils or Salts Damage Prosthetic Components?
Yes, bath oils or salts can damage prosthetic components by leaving residue that raises corrosion risk. I keep mine away from the prosthesis during every soak, since even small splashes can dull finishes and stiffen moving parts.
Don’t rely on silicone sealant to shield your device from water. If oil or water lands on it, wipe it dry right away, paying attention to seams and joints.
Tip: keep a dry towel and a microfiber cloth by the tub, and dry the socket liner before reattaching. Ask your prosthetist which cleaning products suit your components, since mild soap and water is often the safest choice.
Should I Wear My Prosthetic Liner While Showering?
No, you should remove your prosthetic liner before showering, since most liners are not designed to get wet. Think of it like a sailor’s coat that stays ashore while you bathe.
Once you’re out, dry your residual limb thoroughly, especially in skin folds where moisture collects and causes irritation. Pat gently rather than rubbing.
Then prioritize drying the prosthesis before you reassemble. Wipe the socket interior and leave the liner inside out on a rack, away from direct heat.
Tip for today: after your next shower, let the liner air dry for at least 30 minutes before putting it back on. Check your manufacturer’s guidance if your model is labeled shower-safe.
How Soon After Amputation Can I Shower?
You can usually shower after amputation once your surgeon confirms your incision is sealed and can get wet, often one to three weeks after surgery. Until then, keep the wound covered with a waterproof dressing and bathe with a sponge.
When you start showering, use a sturdy shower chair with non-slip feet and sit down before you move. After rinsing, gently pat dry the area with a soft towel and never rub it.
Rubbing can irritate fresh stitches and slow healing. A handheld shower head lets you rinse without standing, so ask your prosthetist or occupational therapist which setup suits you.
Rounding Up
Yes, you can shower safely, but don’t assume every prosthetic is waterproof. I’d check the maker’s rating, use a shower chair and nonslip mat, and keep a removable leg out of the spray except if its instructions say otherwise.
Afterward, dry your skin and residual limb – the remaining part of your leg – before putting the prosthesis back on. If it gets wet, follow the manufacturer’s steps, rather than playing bathroom detective. Choose waterproof only if needed.
Recommended Products
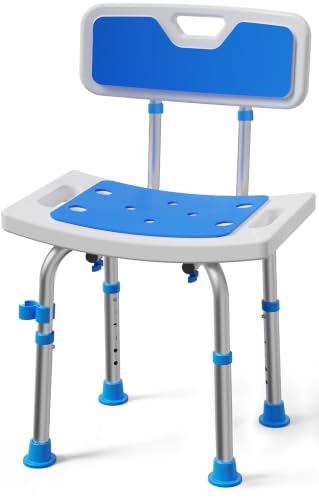
CraMAGI Shower Chair for Inside Shower, 400 lbs Adjustable Chair with Back | Shower Chair with Removable back, 6-Level Adjustable Bath Stool with Wide Backrest and Non-Slip Feet for Seniors and Disabled
Stay seated safely while showering; sturdy frame supports balance and prevents falls.

Drive Medical Tub Transfer Bench for Bathtub, Height Adjustable | Aluminum Tub Transfer Bench Offers Comfortable Backrest and Height Adjustable Design, 350 Lb Capacity
Slide safely into the tub without stepping over the wall; sturdy and stable.

TAILI Grab Bars for Shower,Suction Shower Handles Rails,2 Pack,16.8",Grey | Safety for Bathtubs,Toilet,Elderly&Seniors,Bathroom Grip Bar Heavy Duty Handrails,No Drilling Removable Waterproof,G9
Professional-grade support beside the shower reduces fall risk and boosts confidence.
See today's best deals onBathroom Safety
References
- https://www.enable.health.nsw.gov.au/about/publications/fact-sheets/caring-for-your-prosthetic-lower-limb
- https://primecareprosthetics.com/blog/can-you-shower-with-a-prosthetic-leg
- https://amputeestore.com/blogs/amputee-life/a-guide-to-standing-in-the-shower-with-your-waterproof-prosthetic-cover
- https://patient.uwhealth.org/healthfacts/8014