Hi, I am Aria, welcome to my life!

How to Wash and Sanitize a Prosthetic Liner So It Doesn’t Smell
The #1 Liner Mistake That’s Making You Smell - Fix It in 3 Minutes

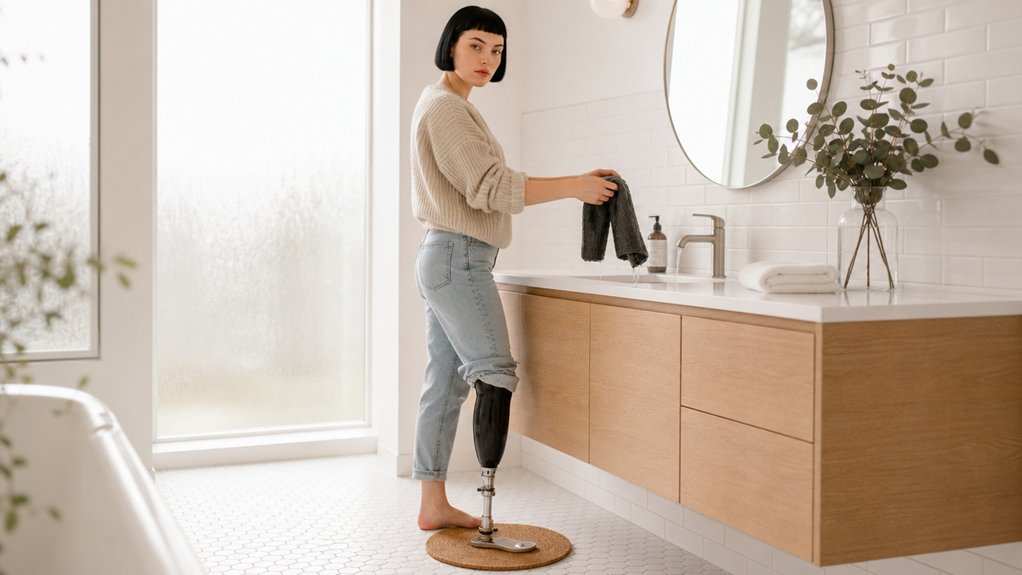
How to wash and sanitize a prosthetic liner so it doesn’t smell isn’t about scrubbing harder – it’s about stopping trapped moisture before bacteria move in. If you’ve noticed a lingering odor even after rinsing, your liner is likely holding dampness against your skin.
The fix is simple: wash it inside out daily with mild soap, rinse until the water runs clear, then dry it completely on a foam block. That’s the core, but weekly alcohol wipes and a monthly deep soak handle what daily washing misses.
We’ll walk through the exact routine, how long each step takes, and what to do if you’re juggling multiple liners. You’ll also get tips on rotating liners and keeping your skin healthy underneath.
Stick with this, and you’ll ditch the smell for good without turning hygiene into a second job. Let’s get your liner fresh and your day moving.
Quick Answer
- Wash daily inside-out with mild soap, rinse until clear, and air-dry fully.
- Deep-clean monthly with pH-neutral cleanser; soak 10 minutes, then rinse cool.
- Weekly, wipe gel with 70% isopropyl alcohol, wait 2 – 3 minutes, then rinse.
- Dry upright on a foam block to prevent trapped moisture and odor.
- Rotate two liners every 24 hours to reduce bacterial growth and smell.
The Daily Wash That Stops Liner Odor Before It Starts
Skipping a daily wash turns your liner into a warm, dark breeding ground for bacteria, and I learned that lesson the hard way.
The smell always wins, so I never skip it now.
At the end of each day, I use lukewarm water, since hot water cooks the gel and cold water won’t lift the grime.
I add one drop of mild liquid soap and gently rub the suds across every sticky inch with my fingers.
No brushes or harsh tools, just my hands to protect the liner’s surface.
I rinse thoroughly because leftover soap irritates the skin.
I pat it dry with a lint-free towel, never wiping hard.
This five-minute routine keeps the liner fresh for the next morning.
For amputees, a clean liner means better skin health and a secure fit, so it’s not an optional step.
Washing daily is the cheapest insurance you have against odor and irritation.
Since wet skin increases friction, I also make sure the liner is completely dry before I put it on, because even a little dampness can increase friction and lead to blisters.
Turn It Inside Out: The Right Way to Wash Your Prosthetic Liner
Turn your prosthetic liner inside out each time you wash it so the gel side is fully exposed.
Always turn your prosthetic liner inside out when washing, exposing the gel side completely.
This is the only way to clean the entire surface and stop odors from building up in the first place.
Start with a prewash check by running your fingers over the gel to feel for tears or grit.
Remove any debris before washing so you don’t push dirt deeper into a nick.
Then check the seam orientation: the fabric seam should sit flat and not twisted, or soap and water will get trapped inside.
Use lukewarm water with mild soap, never hot water, because heat can damage the liner material.
Rinse until the water runs clear, then pat the liner dry with a lint-free towel.
Getting the inside-out flip right is the single most important step, and it prevents most odor problems before they start.
For a prosthetic user, this routine takes two minutes but saves your liner from early wear and the smell of old sweat.
If the liner has a locking pin or a fabric outer layer, keep the pin dry and clean it separately to avoid moisture buildup.
A quick rinse after each wear helps too, but always follow it with a full inside-out wash at least once a day.
Let the liner air dry completely before you put it back on your residual limb.
Pat dry with the towel, then leave it gel-side up on a clean rack until fully dry.
This keeps the gel from sticking to itself and keeps the fabric from holding dampness.
Replace a below-knee prosthetic liner every 6 – 12 months, or sooner if cracks, stretching, lost cushioning, or persistent odor appear.
The habit is simple: flip, inspect, wash, rinse, dry.
Your liner will last longer, smell fresh, and stay comfortable against your skin.
Deep-Clean Your Liner for a Bacteria-Free Refresh

A monthly deep clean is your best defense against bacteria that thrive in a warm, sweaty liner.
This process goes beyond a daily rinse and resets the gel’s microscopic structure for a fresh, secure fit.
Use only pH-neutral, solvent-free cleansers, since harsh chemicals can degrade the silicone and ruin the liner’s grip.
Begin the deep clean by soaking the liner in lukewarm water with a diluted cleanser for ten minutes.
This step lifts trapped oils and salts that daily washing misses.
Gently knead the gel with your fingers to loosen any biofilm without tearing the material.
Avoid scrubbing, which can damage the surface.
Rinse the liner under cool running water until it runs completely clear.
This removes all residue and prevents skin irritation.
I once used bleach and destroyed a liner, so trust me on this.
Stick with a mild baby shampoo or a specialized prosthetic cleaner to keep your liner safe.
Rotating between two liners can also extend their lifespan, since daily washing with mild soap and thorough drying help prevent irritation.
Your residual limb will stay healthy, and your liner will maintain its smooth, comfortable fit.
A gentle approach is all you need for a bacteria-free refresh.
How to Kill Smell-Causing Germs Every Week
Do a weekly alcohol soak to keep smell-causing germs off your gel liner.
Apply isopropyl alcohol to the gel surface, let it sit for a few minutes, then rinse it off.
This routine works for prosthetic liners worn against the residual limb, where sweat and skin oils can breed bacteria.
Repeating this once a week keeps the liner fresh, reduces odor, and maintains a clean fit for your socket.
Use plain isopropyl alcohol from a pharmacy, and avoid soaking too long to protect the liner material.
Rinse with clean water and air dry fully before you wear it again.
Because trapped moisture can contribute to maceration, or skin breakdown from excessive wetness, managing sweat with a clinical-strength antiperspirant may also help keep the liner environment drier between cleanings.
Weekly Alcohol Soak
Your daily hand-wash removes surface grime, but invisible bacteria still cause that funky odor.
A weekly alcohol soak nukes those germs properly, and it takes only a few minutes.
Grab a clean cloth, dampen it with isopropyl alcohol, and wipe the gel liner inside and out.
This routine keeps the liner fresh without wrecking its grip or material.
Use 70% isopropyl alcohol, which kills odor-causing bacteria without drying out the gel too fast.
Check your liner’s spec sheet first; silicone handles alcohol fine, but some urethanes do not.
Let the alcohol sit for two to three minutes, then rinse the liner with water.
Do not soak it overnight, since that overkill can damage the liner’s suspension and fit.
A quick weekly wipe is all you need to keep the liner odor-free and comfortable for daily wear.
Stick to this simple habit, and your prosthetic will stay fresh between scheduled cleanings.
Certain materials, like the gel used in prosthetic sleeves, are also designed to reduce friction and shear stress rather than trap odor-causing moisture.
Germ Killing Method
A weekly alcohol rub removes the odor-causing germs that daily cleaning misses.
Use 70% isopropyl alcohol on a clean cloth, wipe the gel surface, let it sit for two or three minutes, then rinse gently.
This method is cheap and brutally effective for prosthetic liners.
I have used it for years, and it keeps the socket fresh between replacements.
To strengthen your defense, add two tools that target microbes in different ways.
UV-C treatment uses a portable wand that blasts ultraviolet light to fry bacteria in seconds, making it a quick, chemical-free option.
Antimicrobial coatings are factory-applied layers on new liners that repel odor-causing microbes from the start.
Pair either tool with your weekly rub to stay fresh without costly replacements.
If skin irritation or breakdown develops, products like broad antibacterial action ointments can protect fragile residual-limb skin while you continue your liner hygiene routine.
Try the routine, and your nose and socket will thank you.
Drying After Disinfection
After rinsing off the alcohol, let the liner air dry completely before putting it back on.
Wet gel creates a perfect environment for the same bacteria you just killed, so drying is a critical step, not an afterthought.
Alcohol evaporation is your final germ-killing action, and it only works if the liner is fully dry.
To speed up the process, hang the liner on your foam block with the gel side facing outward in a breezy spot, but keep it away from heaters, which can damage silicone.
Follow this quick routine to stay stink-free. Wait at least 30 minutes after rinsing, because patience beats a damp liner every single time.
Then do the touch test: the gel should feel completely dry, not tacky or slick.
Press a clean paper towel against it as a dryness check, and it should come away with no moisture at all.
Wet liners multiply bacteria quickly, so never skip this step. Dry the liner fully, or you’re inviting the odor right back.
Moisture-wicking synthetics in prosthetic socks help move sweat off skin, but a damp liner still traps moisture against the skin and creates a breeding ground for odor-causing germs.
Drying and Storage Mistakes That Make Liner Odor Worse
Trapped moisture is the real cause of liner odor, not sweat alone.
If you skip the foam block drying step, that dampness gets sealed inside the gel quickly.
Use the foam block every time to let air move through the material properly.
Store the liner fabric-side out, because leaving the gel exposed lets odor settle in.
For amputees, this routine matters most with prosthetic liners that touch the skin all day.
Keep the liner on the block until fully dry, then flip it for storage.
This simple habit prevents bacterial growth and keeps the liner fresh longer.
Check the gel surface for any leftover moisture before you put it away.
A dry liner feels better on the residual limb and reduces skin irritation.
Make the foam block your default spot after every wear, no exceptions.
Silicone gel sleeves provide skin protection and friction reduction while managing moisture during daily wear.
Trapped Moisture Risks
Trapped moisture is the real cause of that sour smell, even if you clean your liner well.
Storing it damp leads to skin maceration, which softens and wrinkles your skin and invites fungal infections.
Skip proper drying and three problems follow.
First, damp gel becomes a breeding ground for odor-causing bacteria, so the smell multiplies fast.
Second, moisture traps old soap and sweat into a sticky film that makes future cleaning harder.
Third, constant wetness breaks down the gel material, so your prosthetic liner wears out sooner and feels less comfortable.
For amputees, the fix is simple: dry the liner completely before storing it.
Pat it with a clean towel, then air dry it in a well-ventilated spot away from direct heat.
Check the surface with your fingers; it should feel smooth, not tacky or damp.
Do this every time, and you protect both your skin and the liner’s lifespan.
Replace damp prosthetic socks immediately with clean, dry ones, since moisture-wicking knit fabrics can limit maceration and friction that may trigger swelling and temporary volume changes.
Foam Block Drying Only
After washing your liner, pat it dry and set it aside, but don’t lay it flat on a towel.
Flat drying traps moisture between the folded gel, which breeds bacteria and causes that sour, funky odor.
Use the foam block for drying only, as it keeps the liner’s shape open and allows air to circulate through the hollow center.
Without the block, the liner sags and stretches unevenly, which ruins the fit over time.
Place the liner on the foam block upright, and let gravity work with you, not against you.
This method maintains proper liner balance and prevents the gel from folding onto itself.
Consistent humidity-wicking fibers help move sweat away from the gel surface, so odor-causing moisture has less chance to settle and sour.
Your nose and your prosthetist will notice the difference, so stick to foam block drying as your routine.
Keep it simple: dry on the block, let air flow, and avoid the towel trap.
Fabric-Out Storage Rules
After every wash and foam-block dry, I flip the liner so the fabric side faces outward before storing it, and that move is where most people trip up.
Wrong fabric orientation traps moisture against the gel, which breeds odor, so get this step right from the start.
Store the liner on a foam block in a cool, dry spot, and never seal it in a bag while damp.
Airflow is your first priority, because trapped moisture is the enemy, not the liner itself.
Keep the liner out of direct sunlight, since UV rays break down the gel over time.
A dark closet works better than a sunny windowsill for preserving the material’s integrity.
For extended storage, like days off, use a breathable cotton sack instead of plastic.
Plastic suffocates the liner and stews moisture, while cotton lets it breathe and stay fresh.
For amputees who wear a prosthetic liner daily, this habit directly affects skin health and stump comfort.
Flip the fabric out, dry it fully, and store it loose, and your liner won’t smell like last week’s gym bag.
How Your Skin Care Prevents Liner Odor
Your skin is the real frontline against liner odor, not the liner itself.
Skipping daily cleansing leaves bacteria marinating in sweat and dead cells inside a warm, plastic sleeve for hours.
Wash your residual limb every day with mild, pH-neutral soap.
No fancy ingredients, just gentle and plain.
Rinse completely because soap residue becomes a breeding ground for odor.
Then hydrate your skin in the evening, ideally before bed.
This keeps your skin supple, prevents cracking, and stops odor-causing microbes from settling in.
A cracked surface is a harbor for smells.
Think of it as a two-step routine: scrub, then hydrate.
It isn’t glamorous, but it beats a liner that smells like a gym sock left in a hot car.
Your liner stays fresh only if your skin starts fresh.
Simple as that.
When to Replace or Rotate Liners to Stop Smells at the Source

Even the most dedicated scrubbing routine has a limit, and that’s where rotation and replacement come in.
One liner, no matter how well you care for it, will eventually start holding odors you can’t scrub away.
Set up a rotation schedule where you alternate between two liners every other day. This gives each liner a full 24 hours to air out, which sharply reduces smell-causing bacteria growth.
Watch for three clear replacement cues. First, a persistent odor after a proper wash and disinfect means the liner is past its useful life.
Second, visible cracks or tears in the gel trap dead skin and sweat like a sponge.
Third, loss of tackiness, when the liner slides more than it grips, signals it’s time for a new one.
Do not wait until the liner smells like a gym sock, as I did. Replace it yearly, or sooner if you see these signs, and you’ll avoid the stink circus entirely.
For amputees using prosthetic liners, this routine matters even more because the liner sits directly against your residual limb. A clean, well-aired liner also helps prevent skin irritation and keeps your prosthesis comfortable.
If you rotate two liners, you also extend their overall lifespan. That simple habit saves money and keeps your socket fresh day after day.
So Why Does Your Liner Actually Smell?
Your skin sheds oils and sweat all day, trapping them against that gel surface.
Even if you wipe it down daily, microscopic dampness hides deep in the polymer, feeding odor-causing bacteria.
As the liner ages, heat, friction, and cleaning agents break down the silicone’s molecular bonds.
This releases volatile compounds that smell on their own, like sulfide-like gases.
For amputees using prosthetic liners, this is a common issue.
The trapped sweat and skin cells create a warm, dark environment where microbes multiply fast.
To keep the smell down, wash the liner daily with mild soap and water, then dry it completely.
You can also rotate between two liners so each one has time to air out fully.
The table below shows the two main causes and why they produce odor.
Sweat buildup feeds bacteria, while material degradation releases natural stink compounds over time.
Use a liner-specific cleaner if plain soap leaves a film.
That film can trap more moisture and make the smell worse.
If the liner starts to turn brittle or discolored, replace it.
An old liner breaks down faster and holds odor longer than a fresh one.
Frequently Asked Questions
Can I Use Baby Shampoo Instead of Mild Hand Soap?
Yes, you can use baby shampoo instead of mild hand soap, especially when cleaning your prosthetic liner or residual limb.
Its gentle, pH-balanced formula removes sweat and oils without stripping your skin’s natural barrier.
However, fragrance is a real risk for amputees, since residual limbs already face friction and moisture buildup.
Many baby shampoos contain added scents that can trigger contact dermatitis, redness, or itching under a suction socket.
If you go this route, choose a “fragrance free” or “sensitive” label and avoid “baby fresh” or “lavender” versions.
Also, rinse twice as long as you think is needed, because soap residue trapped against skin can cause breakdown or fungal issues.
For a lower limb amputee, residue on a gel liner is worse than on skin, since it degrades the silicone over time.
If you notice tackiness, odor, or rash, switch back to a dedicated amputee-safe cleanser that is fragrance free and non comedogenic.
Baby shampoo is a temporary backup, not a daily replacement, for most active prosthetic users.
Always pat dry completely before donning, and consider a pH-balanced wipes option for quick midday cleanups.
Pro tip from my workbench: dilute baby shampoo 1:3 with water in a spray bottle, then wipe with a soft cloth.
That reduces the chance of concentrated soap pooling in skin folds, which is where irritation starts.
Bottom line: it works in a pinch, but prioritize gentle, unscented, rinse-friendly products made for prosthetic care.
Your skin is the foundation of your fit, so test on a small area first and monitor for any reaction over 24 hours.
What Happens if I Miss a Weekly Disinfection Session?
Missing one disinfection session might feel harmless, but it is not. Biofilm can start forming on your liner within hours, and that sticky layer protects bacteria from your usual cleaning routine.
That buildup directly raises your risk of skin irritation, folliculitis, and even serious infections. Weekly disinfection is your nonnegotiable shield against these complications, not just a suggestion.
If you skipped a week, do not panic, but do act fast. Clean your liner immediately with the recommended disinfectant, and dry it thoroughly before wearing.
Check your residual limb for any redness, warmth, or open spots. If you see anything unusual, pause wear and consult your prosthetist or healthcare team right away.
Your limb is not a lab experiment, and your socket is not a petri dish. Daily washing with mild soap removes sweat and dead skin, but only weekly disinfection kills the hidden microbes.
Make it a habit, same day each week, and pair it with your liner inspection routine. Consistency beats regret, and it keeps your skin healthy for years of confident mobility.
Is It Safe to Machine Wash My Prosthetic Liner?
Machine washing your prosthetic liner is a risk I would never take, and here is why. The agitation and spinning can warp the gel, tear the fabric, or delaminate the layers, all of which ruin the precise fit that keeps you stable in your socket.
A warped liner also creates pressure points that lead to skin breakdown, blisters, or even falls. Your manufacturer’s care guide is your best friend here, because different liners (silicone, urethane, or copolymer) have different tolerances for heat and friction.
Hand washing with mild, fragrance-free soap is the only safe method I trust, using lukewarm water and gentle kneading. Rinse thoroughly, then pat dry with a clean towel; never wring or twist the liner, and never use a dryer.
Air drying away from direct sunlight or radiators is critical, since heat permanently distorts the gel and shortens liner life. For odor control, soak in a diluted vinegar solution (1 part vinegar to 3 parts water) for 10 minutes every week, then rinse and dry as directed.
Ignoring this advice voids your warranty and risks costly replacements, because most manufacturers explicitly forbid machine washing. If your liner has a locking pin or fabric outer layer, the machine can also snag and tear the suspension system, leaving you stranded.
Finally, always inspect your liner after each wash for tiny cracks or sticky residue, since abrasion from machine washing accelerates wear invisibly. When in doubt, call your prosthetist; they see the damaged liners daily and can confirm your exact care protocol.
Your limb health depends on a secure fit, so a few minutes of hand washing beats a month of painful healing. Stick to the gentle method, and your liner will stay functional, clean, and comfortable for its full lifespan.
How Do I Remove Lingering Odors After Proper Washing?
Lingering smells after a proper wash usually mean the odor is trapped deep in the liner material, not on the surface. You cannot scrub away what is baked into the silicone or gel, so you need a chemical reset.
Soak the liner in a solution of one part white vinegar to three parts cool water for a full hour. This breaks down the biofilm and bacteria that cause stubborn smells, especially from sweat and skin oils.
After the soak, rinse thoroughly with clean water and pat dry with a lint-free cloth. Do not skip this rinse, because leftover vinegar can irritate your residual limb.
Always air-dry your liner completely on a drying block or cone, never flat on a towel. Smell thrives in dampness, so deny it moisture by ensuring the inside is fully exposed to airflow.
For a weekly deep clean, add a few drops of tea tree oil to your regular wash if your liner material allows it. This natural antifungal keeps odor from returning between soaks.
If the smell persists after two vinegar soaks, check for micro-tears or delamination in the liner. Damaged liners trap odor permanently, and replacing them is the only safe fix for your skin health.
Can I Use Vinegar as a Natural Disinfectant Alternative?
Vinegar is often praised as a natural cleaner, but for prosthetics, it simply does not cut it. The acetic acid in vinegar is too weak to reliably kill the bacteria like *Pseudomonas* or *Staph* that cause odor and skin infections.
You need a disinfectant that works fast and dries completely, and vinegar leaves a residue that can trap moisture. Isopropyl alcohol (70% or 91%) is my go-to because it evaporates quickly and disrupts bacterial cell walls without leaving a film.
More importantly, vinegar can degrade the silicone or gel liner over time, causing cracks or loss of suction. I have seen liners turn sticky and brittle after repeated vinegar wipes, which leads to skin breakdown and poor fit.
Safer options include alcohol wipes, diluted hydrogen peroxide (3%), or a dedicated prosthetic cleaner with a neutral pH. Never soak your liner in vinegar, and always rinse with water if you must use it, then pat dry.
For odor, the real fix is daily washing with soap and water, then wiping with alcohol. Vinegar might mask smell temporarily, but it leaves behind a breeding ground for fungi and bacteria.
If you want a natural route, tea tree oil mixed with water (a few drops per cup) has mild antimicrobial action, but it is not a replacement for alcohol. Stick with alcohol for daily kills, and use vinegar only on non-porous surfaces like your shower chair, never on your socket or liner.
Your skin and your prosthetic’s lifespan depend on proper disinfection. Trust the science, not the trend, and keep your gear smelling fresh with alcohol every single time.
Rounding Up
So, you’ve made it this far, which means you’re ready to win the war on stink. Honestly, a neglected liner smells worse than a dead mouse in a gym sock, and I’ve smelled both. But it’s not rocket science – just daily rinsing, weekly deep cleans, and proper drying. Don’t skip the rotation, either. Your nose – and your skin – will thank you. Bottom line: treat your liner like a cheap date, not a roommate who never showers. That’s it.