Hi, I am Aria, welcome to my life!

How to Travel With Spare Prosthetic Parts
Pack Spares in Your Carry-On: The Prosthetic Travel Checklist That Keeps Your Trip on Track

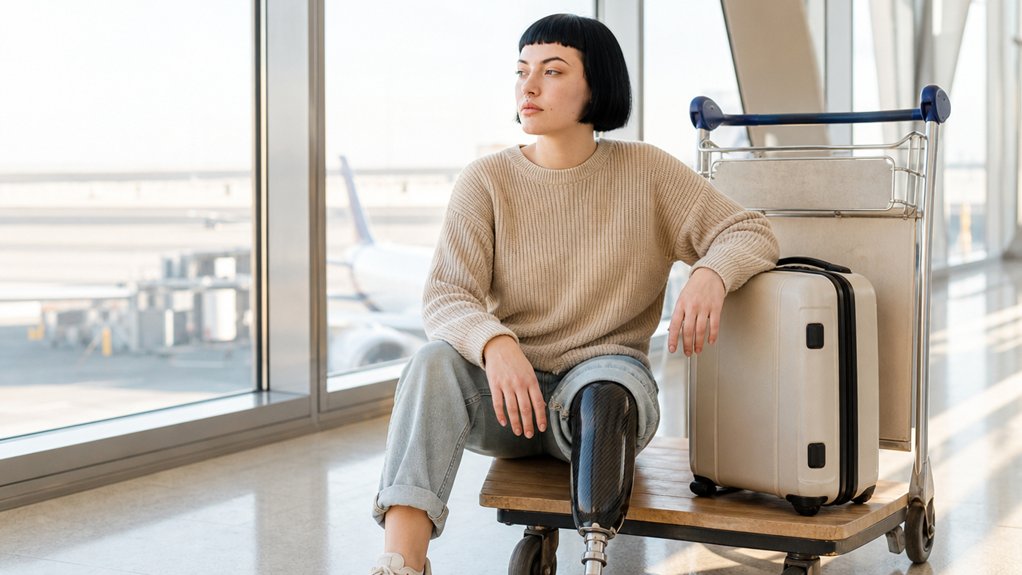
Knowing how to travel with spare prosthetic parts can be the difference between a relaxed trip and a stressful detour. A torn liner or a loose valve rarely waits for a convenient moment, so it pays to plan before you leave home.
This guide covers what to pack, how to test spares before you go, and how to keep your prosthesis papers and clinic contacts within reach. You’ll also find tips on protecting parts from heat and moisture and getting through airport security without second-guessing yourself. Start with the most important rule: keep your spares in your carry-on, not your checked luggage.
Quick Answer
- Pack essential spares: a compatible liner, socket valve, suspension sleeve, and two or three socks in different plies.
- Inspect each part for tears, cracks, worn edges, or debris, and test it at home before traveling.
- Keep spares in a padded, labeled carry-on pouch; never place prosthetic components in checked luggage.
- Separate soft parts from metal fittings and tools, keep everything dry, and cap tools to prevent damage.
- Carry prosthesis documents, prescriptions, warranty details, and prosthetist contact information; check airline rules for medical equipment.
Build Your Spare Prosthetic Parts Checklist

Build your spare parts checklist around the items that keep your prosthesis fitting well and staying on. I don’t pack a full workshop in my bag.
Pack the spare parts that keep your prosthesis fitting well and staying on. Leave the full workshop at home.
My kit holds one spare socket valve, one liner, one stump sock, and one suspension sleeve. Those four items cover most fit and hold problems on the road. Track limb-volume changes by measuring your limb circumference at the distal end and mid-limb to know when to add or remove sock plies.
Pack extra liners and valves if your setup uses them. A single lost part can cause a big travel hassle.
Bring two or three sock plies to adjust for daily volume changes. Your residual limb shrinks and swells through the day, so extra plies help you keep a steady fit.
Ask your prosthetist whether an older liner piece works as temporary padding. Residual limb mapping means noting where your limb changes size or takes pressure.
Track those spots for a few days. Then choose sock plies that match your usual routine.
Compression garments apply gentle pressure to manage swelling. Ask your clinician which type fits your needs.
Keep this compact kit in your carry on bag. Confirm its contents with your prosthetist before each trip.
Inspect Spare Prosthetic Parts Before Travel
As an amputee myself, I check every spare part before I pack. I look over each socket liner, suspension sleeve, pylon, and prosthetic foot for cracks, tears, worn edges, or lint.
Small faults can grow into big problems once I’m away from home. A hairline crack in a pylon or a torn liner can turn a short trip into a long wait for repairs.
I also test the fit and function of each part. I slide my residual limb into each socket and liner, then walk a few steps to confirm that it works as expected. I verify the liner’s cushioning still offers shock absorption without excessive compression that could invite distal edema.
This check is dull, and that’s exactly why I do it before the airport gets involved. Doing it at home means I can fix or replace a part without rushing.
Check Part Condition
As an amputee, I know a spare part only helps if it works. So I inspect every piece before it goes into my bag.
I check for cracks, frayed edges, residue, rust, missing seals, and expired packaging. Valves come first, and I look at the threads and seals for splits or grit.
A small piece of grit can break a seal and let air or fluid in. Liners and sleeves need a close look at the seams.
I scan for tears, thinning areas, or tacky spots that can pull on my residual limb. A worn liner can cause slipping inside my socket and skin problems quickly.
Socks get the same care, and I reject any pair with holes, stretched cuffs, or rough patches. A sock that has lost its shape can’t give my limb the padding it needs.
Tools need a check too, so I confirm that handles, tips, and fasteners aren’t bent or rusty. A bent tip or loose fastener makes a simple adjustment hard when I’m away from my prosthetist.
Protectors show damage in different ways. I check the foam for crushed areas and the covers for cracks.
Flattened foam no longer absorbs impact, so I replace it. Damaged parts stay out of my emergency kit because they’re dead weight that can fail when I need them most.
I discuss weight limits with my carrier so my bag stays manageable. I also compare material durability before I choose replacements.
I label each part with its size and fit details, then store everything dry, away from heat and moisture. Before I leave, I ask my prosthetist about any damage, since a professional can judge whether a part is safe to use.
For covers and fairings in my kit, I verify that any closed-cell neoprene shells lack abrasion or impact damage, since those materials rely on intact structure to protect the mechanical limb.
Test Fit And Function
I never pack a spare part until I have tested it on my residual limb. I test each one at home with my usual liner and prosthetic socks, then walk, sit, and climb stairs.
A function check means I confirm that every moving part works smoothly, without pain, leaks, or odd noise. I check the socket seal, then inspect my skin afterward.
Redness that lasts after I remove the socket is a warning sign I cannot ignore. If anything feels wrong, I contact my prosthetist before I leave home. Since medical-grade silicone and high-density EVA foam maintain shape through hundreds of wear cycles, I also verify my spare liner has not lost elasticity or surface smoothness, as fading grip can increase friction and irritation.
I use this checklist for each spare:
| Spare | Try | Pass sign |
|---|---|---|
| Liner | Wear 20 minutes | No tear, pinch |
| Valve | Seal socket | Holds suction |
| Sleeve | Bend knee | No slip |
| Sock | Walk indoors | Stable fit |
I pack the tested part in my hand luggage so I can reach it quickly. My prosthesis already gives me enough surprises, so my luggage should not add any more.
I test every spare under the same conditions I face in daily life.
Choose Spare Prosthetic Parts for Fit Changes
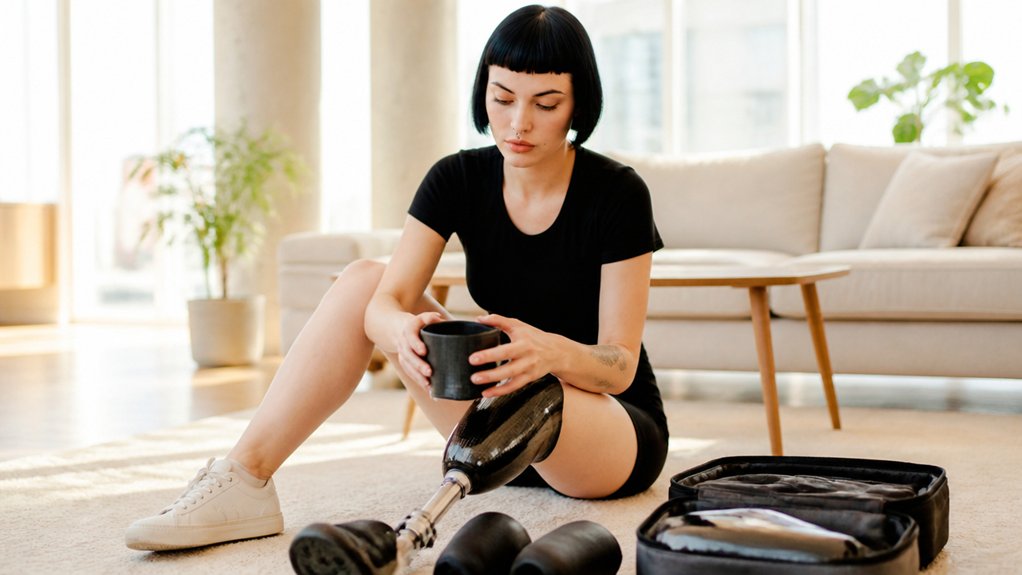
As an amputee, I only pack spare parts that solve changes I expect.
Swelling and shrinking of my residual limb through the day can change how my socket fits, so I plan for those shifts and skip packing a suitcase full of gear I may never use.
I bring two sizes of prosthetic socks with different ply counts. Adding or removing a ply lets me adjust for volume changes in a few minutes, and it keeps my fit steady. To ensure these adjustments work safely, I match sock size to my residual-limb circumference and length, checking the top and toe widths to avoid wrinkles that create shear.
An older liner can help with small changes in volume, but I ask my prosthetist before I use one. A liner that looks similar may not match my socket or my limb shape, so I let the clinician confirm it.
A spare valve is a smart choice when it matches my socket model. It usually costs much less than a new socket, and it can keep my suspension working on a trip.
I match the sleeve size and suspension style to my current setup. A sleeve that’s almost the right size can still slip, rub, or pull, so I check each part against my existing system before I pack it.
I use liner patches only when my prosthetist approves them. Skin reacts poorly to guesswork, so I follow the clinician’s exact instructions.
Before any trip, I compare each spare with my setup. Then I ask my prosthetist to confirm the fit and safe use of every part.
I skip kits labeled universal. Those labels rarely account for my limb, my socket, or my activity level.
I choose compatible parts for changes I know are likely. If I notice pain, redness, or looseness, I contact my prosthetist right away because my fit needs professional attention.
Pack Spare Prosthetic Parts in Your Carry-On
As an amputee, I keep my most important spare parts in my carry on bag. That way, a delayed suitcase can’t leave me without a liner or a socket valve when I need them most.
I pack extra liners, socket valves, and socks with different ply thicknesses first. I choose these items based on what I’m most likely to need for fit changes, since my residual limb can shrink or swell during a trip.
I wrap each part in a soft pouch to protect it during the flight. Prosthetic pieces don’t handle rough landings well, so the padding keeps them from getting damaged.
I also pack my prosthetist’s phone number and a printed copy of my fit notes. Those details help a clinic or repair shop get me fitted again quickly if something breaks.
To keep everything organized and accessible, I use a portable stand that matches the mannequin head’s 22-inch circumference to hold and display my spare facial prosthetics securely in the overhead bin.
Prioritize Essential Spares
Pack your most important prosthetic spares in your cabin bag. That way, a delayed suitcase can’t leave you without a working limb.
Focus on parts that restore fit or basic function first. A spare liner, valve, or suspension sleeve keeps your prosthesis usable when something fails.
An extra liner is the first thing I pack. If mine tears, the socket stays usable until I can get a replacement.
A spare valve or suspension sleeve can fix a small failure that would otherwise ruin my day. These parts are light and take up little room.
I also bring two or three stump socks in different plies. My residual limb changes volume during the day and over the trip, so the extra plies let me adjust the fit.
Old liner pieces make a useful backup for volume adjustment. I keep them in a clearly labeled bag so I can find them fast.
Label every item clearly. Match the number of spares to the length of your trip, plus a few extra days in case of delays.
Check your airline’s baggage policy before you leave home. Extra or overweight bags can add fees quickly, so a sensible kit may cost more than you expect.
Pack what you’ll actually use, confirm your allowance, and travel with a small safety net. You don’t need a full workshop in your luggage.
A suspension sleeve with a silicone top-edge grip helps keep the socket anchored during active travel, reducing the risk of slippage when you’re moving through airports or sightseeing.
Protect Parts In-Flight
I keep my spare prosthetic parts in my carry on bag, where I can reach them at any time and keep them away from rough baggage handling. I never check these parts, because a dropped suitcase can crack a socket or bend a pylon.
I pack my liners, suspension valves, and prosthetic socks in a padded pouch. I separate each item into its own small bag so the parts don’t rub against each other. When selecting a pouch, look for one with a watertight seal to guard against liquid spills from toiletries or drinks during the flight.
Hard edges can tear soft parts, so I keep metal fittings and sharp tools wrapped and away from my liners. A hard case that costs 10 to 20 dollars fits under most airline seats and protects everything inside.
Damp gear grows odor and can weaken materials, so I never pack a wet liner or sock. I add a few silica gel packets to the pouch to pull moisture from the air, and I keep them away from surfaces that touch my residual limb.
I cap every tool before I pack it so nothing pokes through the bag. I check my airline’s rules on carrying medical equipment before each trip.
I label the pouch with my name and phone number, and I keep my prescriptions beside it. Having the prescription on hand helps if a security officer asks questions about the parts.
I leave room in the pouch for an extra sock, since a spare can save a long day when a travel delay hits. Airports have enough surprises already, so one extra sock is always a good idea.
At security, I show the officer what’s inside the pouch if asked. Then I put the pouch back in my bag where I can reach it right away.
Carry Your Prosthesis Documents and Clinic Contacts

I keep my prosthetic documents in my travel kit, where I can reach them quickly.
I also keep printed copies next to digital backups, because airport internet often drops at the worst moment.
I carry my prosthesis passport from my orthopaedic technician.
Before every trip, I check that the passport is still valid.
The passport records the details of my prosthetic limb, so staff can understand my equipment quickly.
My prosthesis passport gives staff a clear record of my limb, helping them understand my equipment quickly.
I also add serial numbers and warranty details, which help if an airline or clinic asks what failed.
My prosthetist writes a letter on clinic letterhead that explains my equipment and my medical need.
I save home and destination limb centre numbers as emergency contacts in my phone.
I keep prescription records in print and in offline files, so I can reach them without a signal.
I also make one page with my travel dates and clinic hours, because I can forget details when I’m tired at the gate.
Everything goes in my hand luggage, and I share the clinic numbers with my travel companion.
Documents stay close to me at all times, because a good plan depends on having the right papers within reach.
Pack Tools to Repair Spare Prosthetic Parts
As an amputee who wears a prosthetic leg every day, I keep a small repair pack with me at all times. Loose parts cause most of my problems, especially the pylon bolts, socket screws, and foot adapter.
A universal Allen key or a compact bike multitool lets me tighten those parts without carrying half a workshop. I check every fastener each morning before I put on my liner and socket.
Strong adhesive or duct tape handles quick fixes when a cover tears or a cosmetic shell cracks. Neither is elegant, but both hold long enough to get me to the clinic.
Treat any patch as temporary. Ask your prosthetist to check the repair as soon as possible, because a hidden crack can shift alignment and rub against my residual limb.
I take off the prosthesis at once if a patch feels loose, hot, or painful on my residual limb. Skin problems can develop quickly, so I don’t wait for the next appointment.
Pack Essential Repair Tools
I pack a small repair kit in my carry on bag because a loose screw or a cracked socket cover can turn a smooth trip into a long wait. As an amputee, I rely on my prosthetic leg every day, so I keep these tools close at hand.
Before I pack, I check the list from my prosthetist. Guessing about tools is a poor plan, and the wrong part can damage my device.
I bring a universal Allen key set. It covers the common fasteners on my prosthetic knee and foot, and it takes up very little space.
For a multitool, I choose a model that’s three to four inches long and carries only approved bits. Blades can trigger extra screening at security.
I pack a small screwdriver that matches the screws on my prosthetic components. A matching tip keeps the screw heads from stripping.
Strong tape can hold a socket liner or a loose cover in place until I reach a clinic. I compare adhesive types before I choose one, then I carry a short roll in its original wrapper so screening staff can see what it is.
Tweezers and a small parts pouch keep tiny pieces, such as set screws or caps, from getting lost in my luggage. I zip the pouch closed and place it in the same pocket as the tools.
I pack only small, approved tools. Everything fits in one clear bag, so I can find what I need fast at the airport or in a hotel room.
Prepare Temporary Fixes
As an amputee, I carry a small repair kit so I can manage minor problems until I reach my prosthetist. The kit holds a universal Allen key or bicycle multitool, which costs about $10, plus duct tape and a few spare parts.
I use these items when a screw loosens or a cover cracks away from the clinic.
For emergency limb repair, I follow one rule. I use only the tool and method my prosthetist has approved for my device.
I never use glue or heat, and I never guess at a bolt size.
Tape works for brief roadside fixes on external parts. I keep it away from any damage that carries my body weight.
I stop walking right away if my socket, joint, or suspension feels unsafe. I sit down, take the weight off my residual limb, and call for help.
I also pack a spare crutch ferrule. The rubber tip keeps my crutch from slipping on wet ground, which can save me from an embarrassing fall.
Then I arrange professional servicing for my prosthesis as soon as possible.
Charge Powered Prosthetic Parts Before Departure
As an amputee who wears a powered prosthetic arm, I charge my device fully before every trip. I start the night before I leave and confirm the battery indicator shows full.
I pack the device’s own charger, its power supply, and a plug adapter that fits the outlets where I travel. Charger labels list a voltage range, and many accept 100 to 240 volts, but I always verify the match before I plug in abroad.
A wrong power supply can turn a travel day into a long troubleshooting session. Lookalike chargers may have the wrong connector or output, so I use only the charger made for my prosthesis.
For models that allow it, I carry a power bank and check its capacity limit before I fly. Airlines set limits on lithium batteries, so I keep the power bank in my cabin bag.
I turn on charging alerts in the companion app so I notice low power well before boarding. That way, I never find out about a low battery in the middle of a connection.
During layovers, I top up only at outlets where charging is allowed, and I stay close enough to hear my gate call. I also save airport charging spots on my phone map before I arrive.
I keep all my charging gear in my cabin bag, along with the user manual. I follow the maker’s travel rules and call my prosthetist if I’ve questions about my model.
Protect Your Skin During Long Travel Days
Protecting my residual limb during travel takes only a few minutes, but a sore spot can turn a long flight into a much longer day. As an amputee, I know how quickly pressure and friction can cause trouble inside my socket.
Before I board, I check my skin in good light. I look for red marks, since they show me where pressure is building early.
I pack my skin care where I can reach it at any time. I keep hygiene supplies, hydrocolloid dressings that cushion blisters, wound cream, and a small mirror in my hand luggage, not buried under my clothes.
Mid-trip, I shift position and ease the pressure on my residual limb. Giving my skin a break helps it recover before the next long stretch.
During a layover, I use the mirror to inspect my skin. Checking early helps me catch problems before they get worse.
Before landing, I recheck how my prosthesis fits. I add cushioning carefully so I avoid new rubbing against my liner.
I watch for lasting redness, broken skin, or pain. If any of these signs continue after I ease the pressure, I call my prosthetist.
A cushion can help on a long trip, but it should never change how my prosthesis fits. Extra padding in the wrong place can cause new sores on my residual limb.
Keep all skin care in your hand luggage. Reaching for it at the right moment keeps small problems from becoming big ones.
Clean Spare Prosthetic Parts and Manage Sweat
I clean my spare prosthetic parts before I pack them, and I manage sweat so they stay ready when I need them. I wash my liners, valves, and suspension sleeves with mild soap and water. Then I let each part dry fully, since trapped moisture leads to odor and skin irritation.
I use a mild soap with no fragrance, and I rinse every part well. Leftover soap can rub against my residual limb and cause sores. I dry each seam and valve with a lint free cloth, then air dry each piece before I seal it in a clean bag.
Sweat builds up inside the socket and can soften the skin, so I plan for it before every trip. I pack my usual antiperspirant and a few spare liner socks. I change socks as soon as they feel damp, before rubbing starts.
I keep wipes and a small towel in my day bag, where I can reach them fast. Checked luggage can get delayed or lost, and I want my supplies with me. I store clean parts apart from used ones in a zipper bag, which costs little and keeps my packing neat.
I pack clean, dry parts in their own bags and keep my supplies within reach.
Get Professional Help After Temporary Repairs
A temporary repair is only a bridge to proper care, so I call my prosthetist or a limb clinic as soon as I can.
I tell them what broke, what I used to fix it, and whether my pain, rubbing, or looseness has changed.
If I’m far from home, I send photos, because a clear picture helps the technician judge the damage.
I never keep walking on a cracked part just because tape makes it look solid. Tape can hide a crack, but it can’t restore the strength the part lost.
At the clinic, I ask the technician to check the socket, the fasteners, the liner, and the suspension. The socket holds my residual limb, so a weak or loose socket can cause falls and skin damage.
I confirm that the fit is safe before I continue my trip. Then I ask how long the repair will last, what it will cost, and whether I need replacement parts.
I keep receipts and notes from every visit in case I need to file a warranty claim.
Before I travel to the clinic, I call ahead, share my location, and ask about appointment times and fees.
Until I’m seen, I use a cane or crutches if my prosthesis feels unstable.
If my skin gets sore, I take the weight off the limb and stop wearing the prosthesis.
The follow up may feel like a hassle, but a small fix now can prevent a much bigger breakdown later.
I get checked by a professional before I return to regular use of my prosthesis.
Frequently Asked Questions
Do Airlines Require Advance Notice When Traveling With Prosthetic Components?
Most airlines do not require advance notice for prosthetic components, but policies differ, so confirm before you fly. Your prosthetic is generally considered a medical device, so you can usually carry it through security with you.
As someone who wears a prosthetic leg myself, I always keep a short letter from my prosthetist listing my components and their serial numbers. Tip for today: call the airline’s special assistance line or check its website under medical devices, and note the agent’s name and reference number.
If you use a microprocessor knee with a lithium battery, check spare battery rules too, since some carriers restrict them in checked luggage.
Can I Bring Prosthetic Spare Parts Through Airport Security?
Yes, you can bring prosthetic spare parts through airport security, and your carry-on is the safest place for them. As an amputee who travels often, I keep spare sockets and liners in a clear bin so screeners can see everything at once.
If a part looks unusual on the X-ray, ask for a private screening and stay calm while the officer inspects it. Carry a letter from your prosthetist listing each component, since that paperwork speeds up the process.
Pack parts in original packaging when possible and place them in the first bin you send through. Before flying, check TSA rules for liner gels and cleaning solutions, since liquids may count toward your limit.
Should I Insure Prosthetic Parts When Traveling Internationally?
Yes, you should insure prosthetic parts when traveling internationally, because replacing a limb component abroad can be costly and slow. Standard travel policies often exclude prosthetic devices or cap their payout, so read the fine print before you leave.
Ask your insurer about cost coverage, policy exclusions, theft, loss, and damage overseas. Some plans only cover items listed on a schedule, so request a rider if your socket or foot is expensive.
I always carry a printed prescription and the serial numbers in a separate bag from my device. Photograph each component and email the files to yourself for easier claims.
Keep receipts and proof of ownership handy at all times.
How Can I Replace a Part if My Spares Are Lost Abroad?
If your prosthetic spares are lost abroad, you can replace a part quickly by finding a local prosthetist rather than waiting for shipments from home. Start with your clinic back home.
They can send a written prescription, the part specifications, and a referral to a prosthetist in the city you are visiting. Ask them to email these files so you can show them on your phone.
Your embassy medical attaché or consulate can also suggest trusted clinics, which helps if you do not speak the local language well. Carry a photo of the lost component and its part number, since many local technicians can match it quickly.
Do Customs Rules Restrict Bringing Prosthetic Components Across Borders?
Yes, customs rules can restrict bringing prosthetic components across borders, and the limits vary by country. Some destinations treat prosthetic parts as medical devices, while others require permits for batteries or powered joints.
As an amputee who travels with my own gear, I carry a letter from my prosthetist listing each component, its serial number, and the medical reason I need it. Keep that letter in your carry-on so you can show it at inspection.
Check the destination’s customs authority website at least three weeks before departure, and confirm whether spare sockets or charging equipment must be declared.
Rounding Up
My verdict: keep critical spare prosthetic parts in your carry-on, and check fit and function before you leave. A simple 10-minute check can catch a loose screw before it becomes an airport project. Remember TSA’s 3-1-1 rule: liquids like gel must be in containers of 3.4 ounces or less. I pack clinic contacts and powered parts too. Small prep beats heroic improvising. You’ll travel lighter, safer, and with fewer surprises. That’s the whole point.
References
- https://assets.ctfassets.net/8ks1shyq5m87/5OaPLlHZvItwCcr2oHgUkf/74bfda7461e24aba4910fbd35042e710/Checklist_traveling_with_a_prosthesis.pdf
- https://www.limbpower.com/application/files/5015/3296/3325/Amputee_Travel_Toolkit.pdf
- https://primecareprosthetics.com/blog/amputee-travel-guide
- https://amputeenews.com/guides/travel-with-a-prosthesis/