Hi, I am Aria, welcome to my life!

How to Size a Shrinker Sock for a Below-Knee or Above-Knee Residual Limb
**Title:** The #1 Amputee Fitting Mistake (And How to Avoid It)

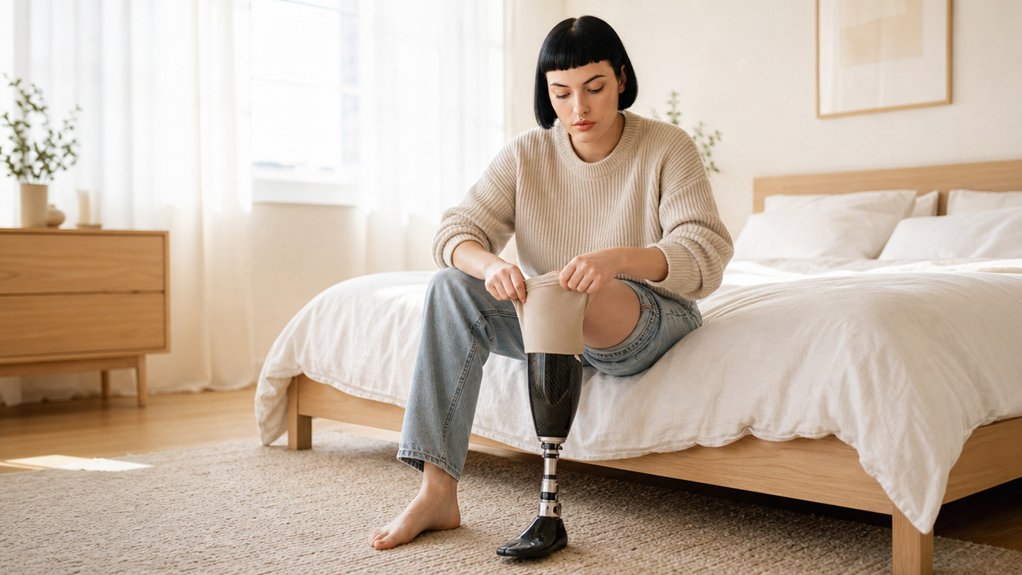
Sizing a shrinker sock for a below-knee or above-knee residual limb doesn’t have to be a guessing game, and getting it wrong is the fastest way to end up with a sock that rolls, chokes, or just doesn’t do its job. If you’ve ever stared at a sizing chart and wondered if your tape measure skills are up to par, you’re not alone.
The good news is, the process boils down to a few simple measurements taken at the right time of day – plus a quick chat with your prosthetist to lock in the right compression level. This guide walks you through exactly where to measure, what numbers matter most, and how to spot the red flags that mean your fit is off before they turn into skin problems.
Grab a flexible tape measure, and let’s get you into a sock that stays put and feels right from morning to night.
Quick Answer
- Measure limb circumference and length in the morning when swelling is minimal.
- Below-knee sizing requires four circumferences and length from patellar tendon to limb end.
- Above-knee sizing prioritizes groin crease length over girth for proper fit.
- Use flexible tape snugly without indenting skin; take three repeat measurements per site.
- Start with 20 – 30 mmHg compression and confirm fit with a prosthetist before increasing.
When to Start Using a Shrinker Sock
Start using a shrinker sock only after your medical team gives you the green light. There’s no calendar date that tells you when to begin; your wound healing status decides that.
A fresh or weeping incision means no compression, so wait until the skin is fully closed and dry.
A fresh or weeping incision means no compression, so wait until the skin is fully closed and dry.
Clinician clearance is your ticket in, and they’ll check for open areas, dermatitis, or arterial issues that make compression risky.
Rushing this step can turn a sock into a setback, so trust the biology, not your eagerness.
Ask your prosthetist or wound care nurse directly when they see the wound ready.
Your skin integrity comes first, and a cleared wound means you can safely move forward with the shrinker.
Follow their timeline, and you’ll avoid complications like skin breakdown or delayed healing.
Do not wear a shrinker over a healing incision without surgeon approval for the specific compression level; irritation, delayed healing, and infection are risks.
How to Measure a Residual Limb Correctly
Measuring your residual limb incorrectly is like guessing your shoe size, so you get a fit that either slips off or squeezes too tight. Take your measurements first thing in the morning, when swelling is at its lowest, to get the most accurate baseline.
You need to locate the exact anatomical landmarks, such as the patella and tibial tuberosity, and mark them with a skin-safe pen. Wrap the tape measure snugly around the limb, but don’t pull it tight enough to indent the skin or restrict blood flow.
Always measure at the same time of day and at the same marked points, because fluid shifts throughout the day change the limb’s volume. Record each measurement in centimeters, not inches, to match the sizing charts used by prosthetists and shrinker manufacturers.
For a below-knee amputation, measure from the knee joint line down to the distal end, and take girth readings every 4 to 6 centimeters. For an above-knee amputation, include the ischial tuberosity and the adductor tendon as your reference points for the proximal edge.
If you have a conical or bulbous residual limb, measure the widest circumference and the narrowest point separately, because the shrinker needs to accommodate both. Do not measure right after removing a compression wrap or liner, because the tissue will temporarily expand and skew the numbers.
Instead, wait at least 30 minutes after removing any dressing, and keep the limb supported in a neutral position during the tape wrap. Write down the numbers immediately, and take three repeats at each site to confirm consistency before sending them to your clinician.
A correct fit means the shrinker stays in place without rolling, and it feels firm but comfortable, like a well broken-in glove. If you feel a deep groove or numbness, your tape was too tight, so redo the measurement with a lighter touch.
Your shrinker or prosthetic socket relies on these numbers, so a small error at the start leads to a big problem later. You can also ask a friend or caregiver to help hold the tape level, especially if you can’t reach the back of your limb easily.
Keep the tape perpendicular to the bone axis, not angled, because a tilted wrap reads larger or smaller than the true size. Once you have the final numbers, compare them to the manufacturer’s size chart and choose the closest match, then confirm with your prosthetist.
Measuring correctly takes five minutes, but it saves weeks of discomfort and avoids extra trips for adjustments. Start with the morning routine, follow the landmarks, and keep the tension steady, and your residual limb will be fitted right the first time. A graduated circular compression shrinker, such as the Truform above-knee model, is tighter at the distal end and eases toward the thigh, so your measurements must capture this taper accurately.
Measurement Timing Matters
Your leg’s size changes naturally throughout the day, so timing matters when you measure for a shrinker.
Measure in the morning, when volume is lowest, to get the most consistent baseline for your sizing decision.
By later afternoon, mild swelling is normal and reflects a typical daily shift.
Evening brings peak puffiness, which won’t match how the shrinker should fit.
Measure twice and order once, so your shrinker hugs your residual limb without strangling it.
A proper fit should feel snug but not painful, and it should stay comfortable through daily wear.
Consistent compression supports fluid movement and swelling reduction, helping the residual limb hold its shape for a more reliable prosthetic socket fit.
Anatomical Landmark Protocol
Two reliable landmarks anchor every below-knee measurement: the patellar tendon and the distal end of the residual limb. Start there, then add detail in layers.
Trace the incision site so the prosthetic sock seam never sits directly over it, and palpate along the tibia to spot sharp bony prominences that need extra padding.
Measure in the morning when limb volume is lowest. Use a cloth tape, pull it snug but not tight, and record each circumference perpendicular to the bone.
Straighten the limb for length, and bend the knee to mark the patellar tendon. Numbers beat your eyesight every time.
Also re-measure at day’s end, since limb volume can change during daily wear and after surgery.
Skip this protocol, and you’ll fight wrinkles and pressure lines all week. Follow it, and sizing takes ten minutes.
Measure twice, fit once. Your residual limb will stay comfortable, and the socket fit will stay stable.
Tension and Tape Technique
Set the right tension before you wrap the tape around the limb.
Too loose gives you a bunched sock, and too tight can choke off circulation.
I aim for a snug fit where two fingers slide under the tape.
That’s my Tape Pressure sweet spot, but measure in the morning when limb volume is lowest.
Keep the tape angle perfectly perpendicular to the limb, with no tilts.
Run it around straight, not diagonally, because diagonal wraps create measurement errors.
Mark the spots with a pen, then measure twice to confirm your numbers.
I’ve botched this more times than I’ll admit, and a wrinkled sock is a painful reminder.
Check alignment by drawing a vertical line and verifying Circumferential Alignment.
The two-finger test confirms snugness without digging in.
Proper tension and clean alignment mean the sock works with you, not against you.
Take your time, trust the measurements, and don’t guess.
Gentle pressure is linked with improved circulation and helps guide residual limb fluids back toward the heart.
Below-Knee Shrinker Sock Sizing Points
Take four circumference measurements and one length measurement to size a below-knee shrinker sock correctly. Start at the distal end of the limb, then measure mid-limb, just below the knee, and at the highest point 5 to 7.5 cm above the knee.
That top measurement matters for prosthetic clearance, because your socket needs room to sit without the sock bunching up. Once you have the numbers, match each one to the size chart’s range and prioritize the mid-limb read, since it reflects true volume best.
The top measurement ensures prosthetic clearance, so your socket fits without bunching. Prioritize the mid-limb read for true volume.
A too-tight top edge creates a choking fit, and wrinkles concentrate pressure, so keep the sock smooth.
For length, measure from the patellar tendon to the limb end with your knee bent.
Take measurements in the morning, when your limb is leanest, and re-check at one, three, and six months, because volume shifts quickly.
Measure twice, order once, and your skin will stay comfortable. Log each circumference change in millimeters or centimeters and adjust sock ply to compensate, since one added layer may offset meaningful volume loss depending on socket geometry.
Above-Knee Shrinker Sock Sizing Points

To size an above-knee shrinker sock, you must take four measurements on the limb.
Measure at the very end, 5 cm up, the midpoint, and as high as you can go toward the groin.
The highest point is the trickiest, since you need to get close to the crease without the sock slipping or rolling down.
Measure the length from that groin crease down to the end of the limb as well.
Take all measurements in the morning, because the limb is less swollen after lying down overnight.
By afternoon, gravity has caused fluid to pool, which can add inches and lead to a poor fit.
Use a flexible tape measure and keep it snug but not tight against the skin.
Write down each number clearly, since the sock manufacturer will need all five values to build the correct size.
For the highest measurement, stand or sit with your leg slightly bent to find the natural crease.
Mark that spot with a pen, then measure straight down to the bottom of the limb.
If you can’t reach the crease easily, ask a partner to help hold the tape.
A well-fitted shrinker sock should feel firm but not painful, and it should stay in place during normal movement.
A sock that loses shape or allows pistoning is unsuitable, so choose a high-elasticity sock with stable knit construction to help prevent migration.
Measurement Points
For above-knee limbs, we measure four key points to ensure the shrinker fits properly and protects your skin. A poorly fitted shrinker can cause discomfort, wrinkles, and even skin breakdown, so precision matters.
Start with the distal point, right at the end of the limb, where pressure control is most critical. Next, measure the lower point about 5 cm up to capture where the limb tapers.
Then, record the upper point at the midpoint, which gives you your volume baseline. Finally, take the highest measurement as close to the groin as possible without going into it.
Always re-verify these measurements in the morning, when swelling is at its lowest. This simple habit helps you avoid the top-tight, bottom-loose effect that ruins fit and causes skin irritation.
Accurate measurement notation at each point stops guessing, and guessing leads to wrinkles or choking in the socket. Your skin will stay healthy if you check all four spots every time. For tapered limbs, use graduated compression is tightest at the bottom and looser upward.
Length From Groin
Measuring an above-knee shrinker sock starts with the length from the groin crease straight down to the limb’s tip. Have the patient stand tall, because slouching skews the tape and leads to a poor fit.
Since the groin is hard to reach alone, tell the patient to use a mirror to confirm the tape sits cleanly against the crease. Privacy matters, so the patient takes the first measurement solo, then you verify it together.
Use this quick guide for expected lengths: 20 to 30 cm suits a short residual limb, 30 to 40 cm fits an average one, and 40 cm or more signals a long residual limb.
Check the fit by looking for top grip at the hip flexor, no gap at the groin, or bunching along the length. Measure twice, because a sock that’s too long rolls into a tight band around the thigh, which feels like a wardrobe failure.
Groin length is the primary sizing factor, more important than girth, so always confirm that number first. Additionally, keep the sock’s size within the stated tolerance of about 1 – 2 cm to avoid excessive compression that can invite distal edema.
Compression Class Fit
Once you have the correct groin length, compression class determines the real fit for an above-knee shrinker. You’re choosing between 20 – 30 mmHg and 30 – 40 mmHg, and higher pressure isn’t automatically better.
Pressure distribution matters more than raw squeeze, since a tight band that compresses the proximal tissue but leaves the distal end loose risks skin damage. Fabric elasticity controls how evenly the sock hugs your limb’s shape, so always test the stretch before applying it.
Check your wound status first, because open areas need lower compression. Measure your limb in the morning for a baseline, not after swelling has built up.
Wrinkles in the fabric mean poor distribution, so reposition the shrinker or resize it. The top edge must lay flat, and it should never roll into a tourniquet effect. A silicone top-edge grip can also help keep the proximal border anchored without over-tightening.
Re-measure at 1, 3, and 6 months after amputation, since limb volume changes over time. Start with the lower class, verify the fit, then step up to 30 – 40 mmHg only if edema persists.
That stepwise approach gives you the sweet spot for healing and comfort.
Choosing the Right Compression Class

Choosing the right compression class starts with your tissue tolerance, not the tightest option available.
Choosing the right compression class starts with your tissue tolerance, not the tightest option available.
A firmer sock doesn’t automatically mean better shrinking, and over-tightening can injure your skin.
The two common classes are 20 to 30 mmHg and 30 to 40 mmHg.
The lower class suits fresh, tender limbs or fragile skin. The higher class works for firmer, more established residual limbs, but only if you can wear it without pain or numbness.
Think of the fit like a firm handshake, not a crushing grip.
If your limb throbs after an hour of wear, that’s your body telling you to back off. Start conservative and only step up later if your clinician agrees.
Skin breakdown from over-tightening can set your shrinking progress back weeks.
Choose the class that lets you wear the sock comfortably for several hours. That comfort zone is your sweet spot for effective volume reduction.
Your limb dictates the right pressure, not the label on the package.
When in doubt, ask your prosthetist for a fitting check before committing to a higher class.
Red Flags That Your Shrinker Sock Fits Wrong
Your limb will tell you quickly if your shrinker sock fits wrong, often within a few wears. Watch for skin discoloration at the edges, such as red, purple, or blotchy patches, which means the top is too tight and cutting off circulation.
Persistent numbness in your toes or foot points to nerve compression from a sock that’s too tight at the distal end. Slippage or bunching at the heel means the sock is baggy there, so you lose compression exactly where your residual limb needs it.
Deep wrinkles that leave lines on your skin after removal concentrate pressure in small areas and can lead to sores. Painful pressure points over bony spots, like the tibia, that don’t ease within an hour are another clear warning sign.
Each of these signals is a direct cue to fix the fit now, not later. Trust the feedback from your residual limb; it’s brutally honest about what’s wrong.
If you notice any of these issues, stop wearing the sock and re-measure your limb immediately, rather than trying to tough it out. A wrong fit delays healing and adds frustration, so getting the size right is worth the effort.
When your shrinker sock fits correctly, you’ll forget it’s even on, which is exactly the goal for your prosthetic journey.
When to Re-Measure and Get a New Sock?
Your limb volume changes often, especially during the first year after amputation. That means a sock that fit perfectly last month may already be too loose or too tight.
I’ve seen patients drop a full sock size in just two months, so early re-measuring isn’t overkill. Re-measure if the sock wrinkles, bunches, or leaves red rings on your skin.
I’ve seen patients drop a full sock size in just two months, so early re-measuring isn’t overkill.
These signs mean compression is off, which can lead to skin breakdown or poor edema control. Also re-measure after any weight change of five to ten pounds, a new prosthetic fitting, or a therapy plateau.
Don’t wait for pain or discomfort to schedule a check. For a new amputee, plan measurements at one, three, and six months after surgery, then once a year after that.
A snug fit isn’t about vanity; it keeps swelling down and protects your residual limb. If the sock gaps or shifts, you aren’t getting the pressure you need in the right spots.
When you’re unsure, just measure again. A new sock costs about $30, while treating a skin issue can cost far more.
The takeaway is simple: re-measure at those milestones, not only when something feels off.
Frequently Asked Questions
Can I Sleep While Wearing My Shrinker Sock?
Yes, you can sleep in your shrinker sock, but only after your medical team gives the green light. Once cleared, wearing it overnight is a standard and safe way to maximize compression time for limb volume control.
Keep your limb elevated on a pillow or wedge to prevent fluid pooling. This is critical for proper shaping and reduces morning swelling that can set back your progress.
Always smooth the fabric completely before you settle in for the night. A single wrinkle can create a pressure line that digs into your skin, causing blisters or sores.
Check for any loose threads or rough seams on the sock before bedtime. Sand down or trim these areas so they don’t irritate you during those long hours of immobility.
Your sleep position matters more than you think. Avoid bending your knee or elbow sharply, as that can bunch the shrinker and cut off circulation at the joint.
Have a spare, clean shrinker ready to swap in if the one you’re wearing gets sweaty or shifts. This keeps your skin dry and prevents breakdown, which is a real risk for new amputees.
If you wake up with tingling, numbness, or a blue tint to your toes, remove the sock immediately. That’s a sign the fit is too tight or misaligned, and you need to reapply or call your prosthetist the next morning.
Don’t layer it under blankets that are too heavy, because overheating can cause itching and swelling. Use a breathable cotton sheet instead, and keep the room cool.
For first nights, start with a few hours and check your skin in the morning. Your tolerance builds over weeks, so listen to your body and never ignore persistent pain.
The bottom line is that overnight wear works beautifully when you follow these rules. It shortens your shaping phase and gets you closer to a proper socket fit, so use that sleep time to your advantage.
How Tight Should the Shrinker Sock Feel Initially?
Your shrinker sock should feel snug but never punishing. Think of it as a firm handshake, not a crushing grip.
You want that initial pressure awareness to be noticeable, yet your fingertips should still slide easily under the fabric. If you feel throbbing, sharp pinching, or your toes turn purple, loosen it immediately.
The right fit means you can wear it comfortably for hours without needing to adjust constantly. A proper shrinker also prevents edema buildup and shapes your residual limb for a prosthetic socket.
As an amputee myself, I know the urge to overtighten for faster results. Don’t do it. Overly tight socks restrict blood flow, damage soft tissue, and slow your healing.
The sock should feel present but not oppressive, like a supportive layer you forget about after a few minutes. Check the skin underneath after 20 minutes: red marks that fade quickly are fine, but deep indentations or numbness mean it’s too tight.
Also, recheck the fit daily because your limb volume changes fast in early months. When in doubt, a looser fit beats a painful one.
Can I Wear Two Shrinker Socks for Extra Compression?
Layering two shrinker socks is a bad idea, and I’ll tell you why from personal experience. You are stacking compression, not adding comfort, and that can quickly push you past safe mmHg limits.
That excess pressure restricts blood flow and can cause tissue damage, skin tears, or even delayed healing around your residual limb. I’ve seen amputees try this thinking tighter means faster shrinkage, but it actually backfires.
Your prescribed shrinker is fitted to your specific limb volume and compression gradient, which is designed for safe, consistent pressure. If it feels loose, that’s a signal your limb has changed, not a reason to double up.
Get re-measured by your prosthetist instead of improvising with a second sock. They’ll adjust your fit or provide a new shrinker that matches your current size.
Also, layering creates uneven wrinkles and friction points, which can lead to blisters or pressure sores that set your progress back weeks. Trust the system, measure your limb weekly, and communicate any looseness early.
Your limb health matters more than squeezing harder, so never exceed one shrinker unless your clinician explicitly tells you otherwise. I’ve learned that patience and proper fit beat any shortcut.
How Do I Wash and Dry My Shrinker Sock?
Treat your shrinker sock like a delicate flower, not a sponge, because rough handling destroys its gradient compression. I handwash mine with a gentle detergent and cold water, never hot, to keep the fibers from breaking down prematurely.
Air drying is the only method I trust, as it preserves the exact knit tension your limb needs. Lay it flat on a clean towel away from direct heat or sunlight, and never hang it, since gravity stretches out the top band.
Never wring or twist the sock, as that is the fastest way to ruin its structure and shorten its lifespan. Instead, press the water out gently with your palms against the towel, rolling the fabric without squeezing.
After rinsing thoroughly, I roll the sock in a dry towel and press firmly to absorb excess moisture. This step is critical for amputees because a damp shrinker will lose shape and cause uneven pressure on your residual limb.
Replace the sock every 3 to 4 months if you wear it daily, because even perfect washing cannot stop natural wear. A worn shrinker feels looser at the top and tighter at the end, which can lead to swelling or chafing, so check the fit weekly.
For best results, rotate between two socks so each one gets 24 hours to dry completely. Never use a dryer, not even on low heat, and skip fabric softeners, bleach, or wringing, because all three destroy the medical-grade compression.
If your shrinker smells after washing, rinse with a bit of white vinegar in the final cycle, then dry flat as usual. And remember, if the sock ever feels sticky or loses its firm squeeze, replace it immediately, as your limb health depends on consistent, even pressure every day.
What Should I Do if My Sock Rolls Down?
If your sock rolls down, it is too loose and that is a clear sign the fit is wrong. For roll prevention, I would re-measure your residual limb first thing in the morning, not at night. You likely need a smaller size or a different brand with a higher silicone grip.
For safe repositioning, never pull hard on the fabric, that can tear the knit or irritate your skin. Instead, roll it back up gently from the bottom, smoothing the material as you go to avoid wrinkles.
Wrinkles are your enemy because they create pressure points inside your prosthetic socket. Check the top band too, if it curls over, that means the elastic is worn out and you need a new sock.
Think about sweat and shrink as the day goes on, your limb volume changes. A sock that fits perfectly at 8 AM can feel loose by 3 PM, so carry a spare in your bag.
I also recommend washing your socks by hand with mild soap, avoid fabric softener because it ruins the stretch. If the rolling continues after a smaller size, talk to your prosthetist about a suspension sleeve or liner change.
The key takeaway is never ignore it, a rolled sock can cause blisters and sores that keep you off your feet. Keep a fit log for a week, track when it rolls, and bring that data to your next appointment.
Rounding Up
So, here’s the bottom line: you don’t guess a shrinker sock size, you measure it. Trust me, eyeballing it leads to a sad, wrinkled mess that does nothing but annoy you. I once had a patient, Dave, who wore a size too big for a week; his limb swelled up like a canned ham. Don’t be Dave. Grab a tape measure, follow the points above, and re-check every few weeks. Your stump changes, and your sock should, too. Get it snug, not strangling.