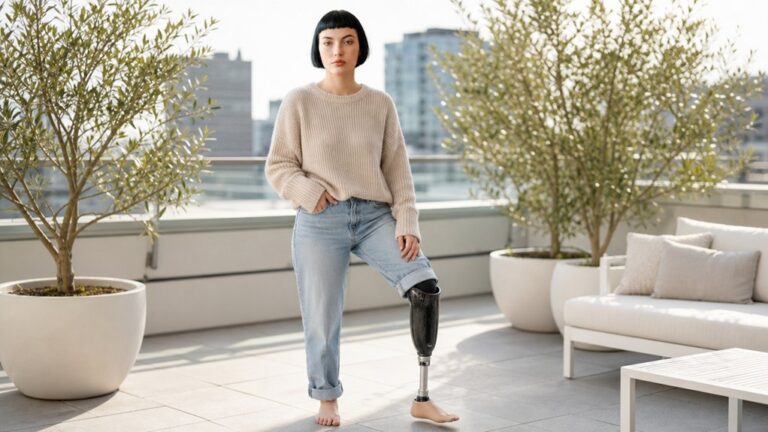
Hi, I am Aria, welcome to my life!

How to Wrap a Residual Limb With the Figure-8 Method
**Stop Wrapping Wrong! Master the Figure-8 in 60 Seconds**


Wrapping a residual limb with the Figure-8 method doesn’t have to feel like a puzzle, even if it looks that way at first. It’s a reliable way to shape your limb and keep your prosthesis comfortable, but only if you get the tension and direction right.
You’ll learn the exact steps to protect your knee, keep the patella free, and avoid those painful circular turns that cut off circulation. I’ll also cover how often to rewrap based on real daily wear, what tightness actually feels like, and the red flags – like tingling or slippage – you shouldn’t ignore.
This guide breaks it down into clear, practical moves so you can wrap with confidence, not guesswork.
No fluff, just the technique that works, plus the finer points that make all the difference.
Stick with me through the next sections, and you’ll have this down before your next rewrap.
Quick Answer
- Position limb at 90 degrees, supported, to ensure flat bandage application.
- Anchor with two full turns, then use diagonal figure-eight passes upward.
- Apply firmest pressure distally, gradually easing toward the proximal edge.
- Keep kneecap exposed, avoiding circular turns or pressure over the tibial crest.
- Rewrap every 4 – 6 hours, checking for looseness, slippage, or skin irritation.
Position Your Body and Knee for a Proper Wrap
Sit on a firm chair or padded bench before you start wrapping your knee. Avoid wobbly stools, since they make the wrap uneven and waste your time.
Set your hips level and bend your knee to a relaxed ninety degrees. This stable base keeps tension consistent from the first wrap turn.
Support your thigh so your quad muscle doesn’t tire out halfway through. A stable posture helps the elastic bandage lay flat and stay secure.
For amputees using a wrap on a residual limb or a knee that works differently, sit square and check that your joint aligns with your hip. Proper alignment prevents pressure points and slippage.
Fix your body position first, and the bandage behaves predictably. If you skip this, you’ll likely redo the wrap before your coffee cools. Gentle pressure from a wrap can guide fluids back toward the heart, so a stable position also supports improved circulation during healing.
Apply the First Figure-8 Turns Below the Knee
Now comes the first crossover: sweep the bandage around the back of your knee, just below the kneecap, then pull it forward and over the initial wrap. That crossing creates the figure-eight shape, which locks the layers in place without any bunching or wrinkling.
Keep your tension firm here, but ease up as you climb higher. The tibia’s crest, that bony ridge on the front of your shin, doesn’t handle direct pressure well.
Two full turns and you’ll feel the limb start to hug back, which is your goal. The wrap should be tight enough to stay put, yet loose enough to let the skin breathe.
Do not rush this step. A sloppy start leads to a slipping mess later, especially for amputee patients who rely on a secure bandage for socket comfort and stump support.
Check that each pass stays below the patella and overlaps evenly. This first figure-eight sets the foundation for the rest of the wrap, so take your time. Matching your wrap tension to your measured residual-limb circumference helps prevent excessive tightness that can impair circulation.
Secure the Bandage End Without Pins or Clips

Tear off two strips of 1-inch paper tape, about four inches each, and press them firmly across the bandage’s loose end to anchor it to the layer below.
This holds the dressing in place without pins or clips, so you won’t poke yourself when you’re half asleep at 2 a.m.
Lay the tape flat, not twisted, because a wrinkle can create a ridge under your prosthetic socket.
Paper tape grips the elastic weave of most bandages without digging in, and it peels off cleanly when you rewrap every few hours.
I tried safety pins once, and my thumb still remembers that mistake.
Grab a roll of paper tape from the drugstore for about three bucks, and you’re set.
Press one strip straight across the end, then add a second strip diagonally for extra hold.
This keeps the bandage from flapping loose during the day, even with your prosthesis on.
Check the tape after an hour to see if it’s slipping.
If it is, just add another strip; it’s cheap and quick to replace.
For amputees who rewrap multiple times daily, paper tape is the simplest option.
It stays put, causes no skin irritation, and never leaves metal marks or holes in your fabric.
If you notice skin breakdown beneath the bandage, moist therapy keeps wounds slightly damp to support new-skin growth.
Press Hardest at the Limb’s End, Not the Knee
Think of wrapping like squeezing toothpaste from the bottom of the tube. Press hardest at the limb’s end, then ease off as you move upward.
This pushes fluid away from the tip and shapes the residual limb into a firm, conical form. That conical shape is what your prosthetic socket needs for a secure fit.
Ignore the knee when applying pressure. The knee is delicate and bony, and it doesn’t tolerate being squished.
So increase tension at the end, let it soften near the top, and you’re set. My first wrap looked wrinkled and lumpy because I pressed with the same force everywhere.
Do not repeat that mistake. Hard at the tip, gentle above.
Use a consistent, firm squeeze at the distal end first, then reduce pressure gradually as you wrap higher. This technique helps shrink the limb evenly and prepares it for the socket.
Check your wrap: the limb should look tapered, not bulging in the middle. If you feel tightness over the patella or tibial areas, loosen the wrap there and reapply.
You want the pressure gradient to push fluid away from the end, not trap it near the knee. Keep the motion smooth, and keep the tension steady at the tip until the final turns.
Match the bandage length to your measured residual-limb length so the full segment is compressed without graduated compression being interrupted by folds or gaps. That is the entire method: hard at the end, soft above, and the socket will fit better.
Keep the Kneecap Free and Avoid Circular Turns

The kneecap must stay fully exposed when you wrap your limb.
Do not place any bandage across it, no matter how secure it feels.
This clearance lets your knee bend without friction and prevents stiffness.
A covered patella can cause pain with every step, as I learned the hard way.
For the wrap direction, never loop the bandage straight around your leg.
That circular turn blocks blood flow above the wrap and strangles circulation.
Instead, angle each pass diagonally in a figure-8 rhythm.
This keeps pressure even and allows your veins to work normally.
Each layer should feel snug, but not tight like a vice.
If your toes tingle or turn purple, the wrap is too tight.
Rewrap every 4 to 6 hours and always check that the kneecap remains bare.
A free patella and diagonal turns keep your residual limb healthy and mobile.
Consistent compression also supports residual-limb shape retention for a better prosthetic socket fit.
Why the Figure-8 Shape Works Best for Your Limb
The figure-8 wrap works best because it controls pressure exactly where swelling gathers. You are tuning a suspension system for your residual limb, not wrapping a mummy.
By crossing the bandage diagonally over the tibia’s crest, you lock tension on the distal end where fluid pools.
Alternating layers spread pressure evenly, so you avoid skin folds and painful bulges.
This method gives you a stable, snug fit that stays comfortable all day.
Your prosthesis sits better, and your residual limb stays healthier with less irritation.
Use a figure-8 pattern every time you apply your shrinker or bandage.
It takes a little practice, but the payoff is a secure fit and fewer adjustments.
Track limb-volume changes by measuring circumference at the distal end, mid-limb, and proximal trimline so you can adjust bandage tension precisely.
Diagonal Tension Control
Wrapping your limb diagonally makes the bandage work with its natural stretch instead of against it.
This angled path lets the elastic recoil evenly, hugging your residual limb’s contours without bunching or pinching.
Keep the same slant on every wrap so the pressure stays predictable from layer to layer.
That directional consistency prevents surprise tight spots that could cut off circulation and turn your stump into a throbbing mess.
Angle the wrap up, cross it over, and loop back down, with each pass reinforcing the last.
It takes a bit of patience, but your limb will thank you with a comfortable, secure fit that avoids the chokehold effect.
Go diagonal, keep the tension steady, and your leg will feel supported, not squeezed.
If you feel tingling, numbness, or soreness, the pressure is probably too high, so unwrap and rewrap with less graduated compression and a smoother, seam-free interior.
Pressure Distribution Precision
The figure-8 bandage pattern prevents the slippage that turns wraps into tight, tourniquet-like bands.
It redirects elastic tension diagonally across the limb, so each pass locks the previous one in place.
This creates load symmetry, meaning even pressure with no bulges or weak spots.
Your residual limb benefits because the wrap spreads force over a larger surface, reducing skin shear and irritation.
The diagonal weave allows you to apply more tension at the distal end and ease off naturally toward the proximal area.
Each crossing gives you a built-in interface measurement, letting you feel the bandage bite evenly and adjust on the fly.
I have wrapped my own stump many times, and straight circles always bunch up.
The figure-8 pattern is precise without being fussy, giving you controlled, repeatable compression for a healing limb.
Trust the X for a secure, comfortable fit that supports your prosthesis and skin health.
Persistent redness or pain 15 – 30 minutes after wear may call for more padding, a load change, or a different interface.
Signs Your Bandage Is Too Tight or Too Loose
Getting the wrap right takes practice, and a bad fit can cause real discomfort. You’ll know it’s too tight if your toes tingle, turn purple, or throb, while a loose bandage slips down, bunches up, or leaves a gaping fold at the end.
For a proper fit, aim for firm pressure that doesn’t squeeze, and test by wiggling your toes. If they move freely without pain, the wrap is likely secure and comfortable.
Check the skin around the bandage edges for any pinching or redness, which signals tightness. Also, make sure the bandage stays flat and smooth along your residual limb to avoid rubbing.
When in doubt, rewrap slightly looser and recheck after a few minutes of movement. A well-fitted bandage supports healing without cutting off circulation or shifting out of place. Persistent slipping, bunching, or increased sweating can also indicate that your prosthetic liner needs replacement or that your wrap technique should be reassessed by a prosthetist.
Tightness and Discomfort Signs
Few things teach patience like the moment your residual limb signals it has had enough. That sharp pinch or dull throb is your bandage asking for a recheck.
Tightness signs aren’t subtle once you know what to look for. Nerve sensations like tingling, numbness, or pins and needles mean pressure is cutting off circulation, so don’t ignore them.
Skin discoloration under the wrap, such as a bluish or purplish tint, signals that blood flow is struggling. Pink is fine; blue is not.
Throbbing at the distal tip, like a bass drum pulse, means you have overdone the tension on the bandage.
If you spot any combination of these signs, rewrap right away.
I learned this the hard way when my first attempt left a purple stripe across my skin. Loose wrapping isn’t better either, but that’s a separate topic. Wrinkles, bunching, or bridging in the wrap can create shear and should be smoothed out immediately.
Your limb’s feedback is more reliable than any instruction I can give, so treat it as your primary guide.
Loose Bandage Indicators
A loose bandage is a quiet problem that often goes unnoticed because it doesn’t cause immediate pain. Instead, you’ll see distal puffiness, where the end of your limb swells and feels boggy, like a poorly stuffed sausage.
You’ll also notice contour loss, meaning the limb’s shape flattens and blurs instead of tapering smoothly. This happens when compression is too weak to hold fluid and tissue in place.
Check your limb every couple of hours for two key signs: it looks rounder than usual, or it feels squishy to the touch. Both mean the wrap has loosened and needs adjusting.
A snug bandage should not slide, bunch up, or let you pinch fabric away from your skin. If it does any of those things, it’s too loose for proper prosthetic fit.
| Loose Bandage Sign | What It Means |
|---|---|
| Slipping after 10 minutes | The bandage grip is failing, not your wrapping technique |
| Wrinkles bunching behind the knee | Layers were not tensioned diagonally across the joint |
| Skin feels cool to the touch | Blood is pooling because pressure is too weak |
| Prosthesis wobbles on the limb | The limb shape changed, so the socket fit is now uncertain |
| Rewrap needed before 4 hours | The compression is not doing its job for edema control |
When the bandage is correct, you forget it’s there.
When it’s loose, you’re always adjusting it, which is your cue to rewrap.
A proper wrap should feel firm but not tight, and it should stay put for at least four hours without shifting.
If you notice any of the signs above, remove the bandage, rewrap with even tension, and check again in two hours.
This routine keeps your residual limb shaped well and reduces swelling, which directly supports a stable prosthetic fit.
Proper Fit Adjustment Tips
A proper wrap needs steady, even compression without cutting off circulation.
If it feels like a vise grip, loosen it and rewrap right away.
Check for three signs to know if the fit is right.
First, if you feel tingling, see blue toes, or notice throbbing, the wrap is too tight.
Loosen it immediately and reapply with less tension.
Second, if the bandage slips or gaps near your knee, compression is too weak.
Rewrap with more consistent pull so the liner sits correctly.
Third, if you see puckering or wrinkles, the pressure is uneven across the limb.
Smooth out those folds, because uneven pressure affects liner alignment later.
A snug, smooth wrap supports your residual limb and keeps the prosthetic comfortable.
Check the fit a few minutes after wrapping, and again after moving around.
Adjust as needed until it feels secure but not painful.
A good rule is to aim for the same pressure you’d use holding a rolled towel.
That gives you enough grip to stay put without squeezing too hard.
When to Rewrap: Every 4 – 6 Hours or When Loose
There are two simple rules for rewrapping. First, plan to rewrap every four to six hours on a set schedule. Second, if the wrap feels loose or starts slipping, rewrap right away without waiting. I learned this after a bandage went slack mid-afternoon and caused problems.
Now I set phone reminders, and you should too, because a snug wrap controls swelling and supports the limb properly. A loose wrap bunches, wrinkles, and fails to do its job, leaving you uncomfortable and your limb unprotected. So don’t wait for the timer if the wrap is sagging; rewrap immediately.
If it holds tight, stick to your scheduled times. Check by pressing gently on the wrap; if there’s any give, it’s already too loose. The key point is that regular timing beats guessing, but looseness always overrides the schedule.
For amputee care, this keeps your residual limb healthy and well-shaped. Your limb will feel better and heal faster with consistent, snug rewrapping.
Change Bandages Daily and Check for Skin Irritation
Changing your bandage every day is a simple way to protect your skin and keep your residual limb healthy.
A fresh wrap holds pressure properly, while an old one stretches out and can cause friction or sore spots.
Peel off the old bandage slowly, and check each inch of skin for redness, blisters, or raw patches.
Wash the limb with mild soap and warm water, then pat it dry with a clean towel, never rub.
Apply a thin layer of moisturizer, but skip any open wounds or irritated areas.
Rewrap snugly, but not so tight that the skin turns shiny or deep red.
Daily changes act as your built-in skin check, so you catch problems early.
A little pinkness is normal, but bright red or glossy skin means you’re wrapping too tight.
Loosen the bandage and reapply it with less tension if you see those signs.
Ignoring irritation can lead to a painful rash that slows down your recovery, so fix it right away.
Frequently Asked Questions
Can I Reuse the Same Bandage After Washing It?
Yes, you can reuse a bandage after washing, but only if it is designed for multiple uses. Check the care label first, because most everyday bandages lose their stickiness and structure after one wash.
Use mild soap and lukewarm water to clean it, then let it air dry completely before reapplying. Never wring it out or use heat, as that destroys the adhesive and fabric fibers.
A washed bandage will not perform like a fresh one, so inspect it for tears, fraying, or lost stretch before every reuse. If it no longer hugs your limb snugly, replace it immediately, even if it looks clean.
For amputees, a loose bandage can cause friction sores or poor compression, which delays healing. Stick to a strict replacement schedule, typically every 1 to 3 days depending on your activity level and sweat.
I personally rotate two bandages, washing one while wearing the other, but I never push one past its fifth wash. Track how many cycles each bandage has gone through, because elasticity fades quietly and then fails on you mid-stride.
When in doubt, spend the few dollars on a new one. Your residual limb deserves a snug, secure fit every single time, and no amount of washing can restore that original grip.
What Should I Do if My Limb Feels Numb?
Numbness in your limb is a red flag you should never brush off. It often means your socket, liner, or suspension system is cutting off blood flow or compressing a nerve.
First, remove the pressure source immediately by taking off your prosthetic or loosening the wrap. Check the skin for red marks, pale patches, or a bluish tint, and gently massage the area to encourage circulation.
If the numbness fades within 5 to 10 minutes after re-adjusting, that’s a good sign. Reapply the prosthetic with a looser fit or an added sock, and watch for any return of tingling or coldness.
However, if numbness persists beyond 20 minutes, or worsens, contact your prosthetist or clinician right away. Delaying can lead to nerve damage, skin breakdown, or even tissue loss.
For amputees, lasting numbness may also signal a poorly fitted socket, a worn liner, or swelling changes in your residual limb. Check for new calluses, moisture buildup, or a shift in your gait, because these can silently cause pressure points.
Never try to “tough it out” with a numb limb. Keep a spare sock or thin liner on hand for quick adjustments, and always report recurring numbness to your care team so they can modify your device.
Track the pattern: does it happen after sitting, walking, or sleeping? Share that with your prosthetist, because targeted adjustments often solve the issue.
If you notice numbness plus pain, weakness, or skin that feels cool to the touch, treat that as an emergency and seek medical help immediately. Your limb’s long term health depends on catching these signs early.
How Tight Should the Bandage Feel at First?
Firm but comfortable is your target, like a good handshake that supports without squeezing. The bandage should feel snug at the very end of your limb (the distal tip) and gradually become looser as it moves up your residual limb.
That gradient respects your circulation, which is critical in the first hours after surgery or a new fit. You should never feel pulsing, sharp pinching, or a sense of the skin stretching painfully. If you do, loosen it right away, because that’s your early warning system for compromised blood flow.
A good test is to slide one fingertip under the bandage’s edge; if it fits without force, you’re in the right zone. Watch for color changes in your skin: a healthy limb stays pink or your normal tone, not white or blue.
If you feel tingling, coldness, or that “leg fell asleep” sensation, that is a hard stop. Loosen and rewrap now, not later, because nerve compression can create bigger problems than a loose dressing.
Can I Sleep With the Bandage Still Wrapped On?
Yes, you can sleep with the bandage still wrapped on, but nighttime wear requires a different level of care than daytime. I do it myself, yet I never treat it as a set-and-forget situation.
You should always rewrap with a fresh, snug fit right before bed for maximum comfort and safety. A bandage that shifts while you sleep can create uneven pressure points that lead to trouble by morning. I check for tingling, numbness, or throbbing the moment I wake, and I loosen the wrap immediately if any of those signs appear.
Never ignore overnight swelling, because that is the first red flag of restricted circulation. Keep your limb elevated on a pillow to reduce fluid buildup, and always use a breathable, moisture-wicking dressing to prevent skin maceration. I also recommend a nighttime-specific liner or padded prosthetic sock if your residual limb tends to swell more after dark.
If you feel sharp pain or see discoloration, do not wait until morning to fix it. Get up, rewrap, and if the symptoms persist, contact your prosthetist or wound care nurse right away. A safe night’s sleep depends on your willingness to respond to your limb’s signals, not just your comfort.
Is It Okay to Wrap Over a Surgical Drain Site?
No, I would not wrap directly over a surgical drain site. That area is highly vulnerable, and direct pressure or friction from standard bandages can cause serious complications.
Your drain needs proper protection and separate incision coverage to keep bacteria out and allow fluid to escape safely. A plain wrap can trap moisture, shift the drain tube, or even pull at your sutures when you move. That is a fast track to infection or delayed healing.
In my experience as an amputee, I always use sterile drain dressings with a precut slit that fits snugly around the tube. Then I layer a nonstick pad over the incision, followed by a light, breathable wrap that goes around but never tight over the drain site itself.
Before you change anything, call your surgical team and ask for their exact protocol. They may want a specific foam dressing or a drainage pouch, depending on how much fluid you are producing.
Never improvise with household tape or elastic wraps, because even gentle compression can kink the drain and block outflow. That leads to fluid buildup under the skin, which can become a painful seroma or abscess.
Your best move is to keep the area dry, loose, and visible during dressing changes. If you see redness, warmth, or a foul smell around the drain, stop and contact your doctor right away.
Safety is my top priority, and so is your peace of mind. Ask your nurse to show you the exact technique once, then practice it with their supervision before you go home.
Rounding Up
So, you’ve wrapped your leg into a lumpy mummy impersonation. Don’t sweat it; my first try looked like a python ate a grapefruit. The figure-8 is your friend, not a fashion statement. Rewrap every few hours, seriously, or your toes will stage a purple revolt. Loose is better than a tourniquet; you’re not stopping a getaway car. Check your skin daily, since ignoring it is a rookie move. You’re basically a professional now. Or at least, a well-dressed one.